-
Chapter 2: Publishers & SubscribersRaywenderlich/Combine: Asynchronous Programming 2020. 7. 5. 18:16
Version
Swift 5.3, iOS 14, Xcode 12
Combine의 일부 기본 개념 일부를 배웠으므로, 이제 Combine의 핵심 구성 요소인 publishers와 subscribers 두 가지를 살펴본다.
이 장(chapter)에서는 publishers를 만들고 subscribers로 해당 publishers를 구독(subscribing)하는 몇 가지 예시를 살펴본다. 그렇게 함으로써, 이 책의 나머지 부분과 그 이후에 사용할 중요한 기술을 습득한다.
Getting started
Note: 책 전체에 걸쳐 각 장(chapter)에서 사용할 playgrounds와 프로젝트(projects)의 시작(starter) 및 최종(final) 버전이 있다. 시작 폴더(starter)는 각 예제와 챌린지(challenge)의 코드를 입력할 수 있도록 준비되어 있다. 작업이 마치거나 도중에 막힐 때, 최종(final) 버전과 비교해 볼 수 있다.
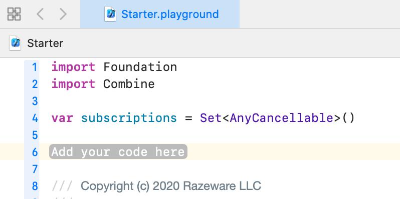
프로젝트(projects) 폴더에서 Starter.playground를 열면 다음과 같이 표시된다:
프로젝트 네비게이터(Project navigator)의 Sources(View ▸ Navigators ▸ Show Project Navigator 에서 Combine playground 페이지)를 열고, SupportCode.swift를 선택한다. 다음과 같은 도우미 함수
example(of:)가 포함되어 있다:public func example(of description: String, action: () -> Void) { print("\n——— Example of:", description, "———" action() }이 함수를 사용하여 책 전체에서 사용하는 예시(examples)를 캡슐화(encapsulate)한다.
이러한 예제(examples)를 사용하기 전에 먼저 publishers, subscribers 및 구독(subscriptions)에 대해 먼저 알아볼 필요가 있다. 이것들은 Combine의 기초를 형성하며, 일반적으로 비동기(asynchronously) 데이터를 송수신(send and receive) 할 수 있다.
Hello Publisher
Combine의 핵심은
Publisher프로토콜(protocol)이다. 이 프로토콜(protocol)은 하나 이상의 subscribers에게 시간 경과에 따라(over time) 일련(sequence)의 값(values)을 전송(transmit)할 수 있는 유형에 대한 요건을 정의한다. 다시말해, publisher는 관심있는 값을 포함 할 수있는 이벤트를 게시(publishes)하거나 내보낸(emits)다.이전에 Apple 플랫폼(platforms)에서 개발한 적이 있다면 publisher를
NotificationCenter와 같은 것으로 생각할 수 있다. 실제로NotificationCenter에는 브로드 캐스트 알림(broadcasted notifications)을 게시(publish)하는,Publisher유형을 제공(provides)하는publisher(for:object:)메서드(method)가 있다.이를 확인하려면 시작(starter) playground에서 Add your code here 자리 표시자(placeholder)를 다음 코드로 바꾼다:
example(of: "Publisher") { let myNotification = Notification.Name("MyNotification") //알림을 만든다. let publisher = NotificationCenter.default .publisher(for: myNotification, object: nil) //기본 NotificationCenter에 액세스하고, publisher(for:object:)의 반환값을 지역 상수에 할당한다. }publisher(for:object:)를 Option-click하면, 기본(default) 알림 센터(notification center)에서 알림(notification)을 전파(broadcasts)할 때, 이벤트를 발생시키는Publisher가 반환되는 것을 볼 수 있다.알림 센터(notification center)에서 이미 publisher없이 알림(notifications)을 전파(broadcasting)할 수 있는데, 알림(notifications)을 게시(publishing)하는 이유는 무엇인가?
이러한 유형(types)의 메서드(methods)는
NotificationCenter와 같은 기존의 API를 Combine-ify한 방법(bridge)으로 구현한 것으로 생각할 수 있다.publisher는 두 가지 종류의 이벤트를 내보낸(emits)다:
- Values, also referred to as elements.
- A completion event.
publisher는 0개 이상의 값(values)이나 오직 하나의 완료(completion) 이벤트(event)를 내보낼(emit)수 있다. 이벤트는 정상적인 완료(completion) 이벤트(event)이거나 오류(error)일 수 있다. publisher가 완료(completion) 이벤트(event)를 내보내(emits)면, 완료(finished)되어 더 이상 이벤트(events)를 내보(emit)낼 수 없다.
publishers와 subscribers에 대해 자세히 알아보기 전에, 먼저 기존의
NotificationCenterAPI를 사용하여 관찰자(observer)를 등록하고 알림을 받는 예를 알아봤다. 해당 알림(notification) 수신에 더 이상 관심이 없는 경우, 해당 관찰자(observer)의 등록을 취소할(unregister) 수도 있다.이전 예제의 끝에 다음 코드를 추가한다:
let center = NotificationCenter.default
//기본 NotificationCenter를 가져온다.

let observer = center.addObserver(forName: myNotification, object: nil, queue: nil) { notification in
    print("Notification received!")
} //알림을 받을 옵저버를 생성한다.

center.post(name: myNotification, object: nil) //알림 개시

center.removeObserver(observer) //NotificationCenter에서 옵저버를 제거한다.
playground을 실행(run)한다. 콘솔(console)에 출력된 결과는 다음과 같다:
——— Example of: Publisher ———
Notification received!예제명은 실제 publisher에서 출력(output)된 것이 아니기 때문에 약간 오해의 소지가 있다. 이를 위해서는 subscriber가 필요하다.
Hello Subscriber
Subscriber는 publisher로부터 입력(input) 받을 수(receive) 있는 유형의 요구 사항(requirements)을 정의(defines)하는 프로토콜(protocol)이다. 곧Publisher와Subscriber프로토콜(protocols)을 준수하는 방법에 대해 자세히 알아볼 것이다. 지금은 기본(basic) 흐름(flow)에 중점을 둔다.이전과 같이 playground에 새로운 예제를 추가한다:
example(of: "Subscriber") {
    let myNotification = Notification.Name("MyNotification")

    let publisher = NotificationCenter.default
        .publisher(for: myNotification, object: nil)

    let center = NotificationCenter.default
}
만약 지금 알림(notification)을 게시(post)한다면, publisher는 이를 내보내(emit)지 않을 것이다. 이는 기억해야할 중요한 차이점(distinction)이다. publisher는 하나 이상의 subscriber가 있을 때에만 이벤트(event)를 내보낸다(emits).
Subscribing with sink(_:_:)
이전 예제에서 계속하여 다음 코드를 추가한다:
let subscription = publisher .sink { _ in print("Notification received from a publisher!") } //publisher에서 sink를 호출하여 구독을 만든다. center.post(name: myNotification, object: nil) //알림 개시 subscription.cancel() //구독 취소sink메서드(method)의 이름이 모호하다(obscurity)는 생각이 들면,sink를 Option-click을 하여 정보를 확인해 볼 수 있다. subscriber에게 클로저(closures)를 연결하여 publisher의 출력(output)을 처리(handle)하는 간편한 방법을 제공한다는 것을 알 수 있다. 이 예에서는 이러한 클로저(closures)를 무시하고, 알림(notification) 받았음(received)을 나타내는 메시지를 대신 출력한다. 구독(subscription) 취소(canceling)에 대해서는 조만간 자세히 알아볼 것이다.playground를 실행(run)하면, 다음과 같은 출력을 확인할 수 있다:
——— Example of: Publisher ———
Notification received from a publisher!sink연산자(operator)는 publisher가 방출(emits)하는 값(values)을 계속 받는다(receive). 이것을 무제한 수요(unlimited demand)라고 하며, 이에 대해서는 곧 배울 것이다. 이전 예제에서는 무시했지만 sink 연산자(operator)는 실제로 두 개의 클로저(closures)를 제공한다. 하나는 완료(completion) 이벤트(event) 수신(receiving)을 처리(handle)하고 다른 하나는 수신(receiving) 값(values)을 처리(handle)한다.작동 방식을 확인하려면 playground에이 새로운 예제를 추가한다:
example(of: "Just") {
    let just = Just("Hello world!") //한 번만 작동하는 publisher
    //Just는 primitive value로 publisher를 생성할 수 있다.

    _ = just
        .sink( //publisher에 대한 구독을 하고 수신된 각 이벤트에 대한 메시지를 출력한다.
            receiveCompletion: { //완료 이벤트에 대한 클로저
                print("Received completion", $0)
            }, receiveValue: { //수신 값에 대한 클로저
                print("Received value", $0)
            }
        )
}
playground를 실행(run)하면, 다음과 같은 출력을 확인할 수 있다:
——— Example of: Just ———
Received value Hello world!
Received completion finishedJust를 Option-click하면 빠른 도움말(Quick Help)을 확인할 수 있다. 각 subscriber에게 출력(output)을 한 번 내보낸(emits) 후 완료(finishes)하는 publisher이다.예제 끝에 다음 코드를 추가하여, 다른 subscriber를 추가한다:
_ = just
    .sink(
        receiveCompletion: {
            print("Received completion (another)", $0)
        }, receiveValue: {
            print("Received value (another)", $0)
        }
    )
playground을 실행(run)한다. 이름대로
Just는 각 새 subscriber에게 출력(output)을 한 번만 내보(emits)낸 다음 완료(finishes)한다.——— Example of: Just ———
Received value (another) Hello world!
Received completion (another) finishedSubscribing with assign(to:on:)
sink외에 내장된(built-in)assign(to:on:)연산자(operator)를 사용하면, 수신된(received) 값(value)을 객체(object)의 KVO를 준수하는(KVO-compliant) 속성(property)에 할당(assign)할 수 있다.다음 예제를 추가하여 작동 방식을 확인한다:
example(of: "assign(to:on:)") {
    class SomeObject { //클래스
        var value: String = "" {
            didSet { //속성 옵저버
                print(value)
            }
        }
    }

    let object = SomeObject() //클래스의 인스턴스 생성

    let publisher = ["Hello", "world"].publisher //문자열 배열으로 publisher를 만든다.

    _ = publisher
        .assign(to: \.value, on: object) //수신된 각 값을 객체의 value 속성에 할당하여 publisher를 구독한다.
    //KVO에서 \.변수명 으로 관찰하고자 하는 속성에 접근할 수 있다. keyPath를 \.변수명 으로 쓸수 있다.
}
playground를 실행(run)하면, 다음과 같이 출력된다:
——— Example of: assign(to:on:) ———
Hello
world!Republishing with assign(to:)
@Published속성(property) 래퍼(wrapper)로 표시된(marked) 다른 속성(property)을 사용해 publisher가 내보낸(emitted) 값(values)을 다시 게시(republish)하는 데 사용할 수 있는assign연산자(operator)의 변형(variation)이 있다. playground에 다음 새 예제를 입력한다:example(of: "assign(to:)") { class SomeObject { @Published var value = 0 } //@Published 속성 래퍼로 annotated된 속성을 사용하여 class의 인스턴스를 정의하고 생성한다. //이는 일반 속성으로 액세스할 수 있는 값에 대한 게시자를 만든다. let object = SomeObject() object.$value .sink { print($0) } //@Published 속성에 $ 접두사를 사용하여, 기본 publisher에 대한 액세스 권한을 얻고 //subscribe하여 수신된 각 값을 출력한다. (0..<10).publisher .assign(to: &object.$value) //숫자의 publisher를 만들고, 그것이 내보낸 각 값을 객체의 value publisher에 할당한다. //&를 사용하여 속성에 대한 inout 참조를 나타낸다. }assign(to:)연산자(operator)는 내부적으로(internally) 수명주기(lifecycle)를 관리(manages)하고,@Published속성(property)이 해제(deinitializes)되면 구독(subscription)을 취소(cancels)하기 때문에AnyCancellable토큰(token)을 반환(return)하지 않는다.단순히
assign(to:on:)을 사용하는 것과 비교해(compared), 이것이 어떻게 유용한지 궁금할 것이다. 다음 예제(example)를 고려(consider)해 본다. 이 예제(example)는 playground에 추가할 필요가 없다:class MyObject { @Published var word: String = "" var subscriptions = Set<AnyCancellable>() init() { ["A", "B", "C"].publisher .assign(to: \.word, on: self) .store(in: &subscriptions) } }이 예제(example)에서
assign(to: \.word, on: self)를 사용하고 결과인AnyCancellable을 저장(storing)하면, strong reference cycle이 생성된다.assign(to:on:)을assign(to: &$word)로 바꾸면(replacing), 이 문제(problem)가 방지(prevents)된다.지금은
sink연산자(operator)를 사용하는 데 중점을 둔다. 그러나 8장(chapter) "In Practice: Project "Collage","과 그 이후의 장들(chapters)에서@Published속성(properties) 사용에 대해 더 자세히 알아볼 것이다.Hello Cancellable
subscriber가 완료(done)되고 더 이상 publisher로부터 값(values)을 받지(receive) 않으려는 경우, 구독(subscription)을 취소(cancel)하여 리소스(resources)를 확보(free up)하고 네트워크(network) 호출(calls)과 같은 활동이 발생하지 않도록 하는 것이 좋다.
구독(subscriptions)은
AnyCancellable의 인스턴스(instance)를 "cancellation token"으로 반환(return)하므로 구독(subscription)이 완료(done)되면 이를 취소할 수 있다.AnyCancellable은Cancellable프로토콜(protocol)을 따르며, 이를 위해서는cancel()메서드를 구현해야 한다.앞서 Subscriber 예제의 맨 아래에
subscription.cancel()코드를 추가했다.Subscription프로토콜(protocol)이Cancellable을 상속(inherits)하기 때문에, 구독(subscription)에서cancel()을 호출할 수 있다.구독(subscription)에서
cancel()을 명시적(explicitly)으로 호출(call)하지 않으면, publisher가 완료(completes)될 때까지 또는 일반적인 메모리 관리로 저장된 구독(subscription)이 해제(deinitialized)될 때까지 계속된다. 이 시점에서 구독(subscription)은 취소(cancel)된다.Note: 현재 playground에서는 구독(subscription)의 반환(return) 값(value)을 무시할 수 있다(예 :
_ = just.sink ...). 그러나 한 가지 주의(caveat)해야 할 점은 전체 프로젝트(projects)에 구독(subscription)을 저장하지 않으면, 프로그램(program) 흐름(flow)이 생성된 범위(scope)를 벗어나면 해당 구독(subscription)이 취소된다는 것이다.이런 시작하기 좋은 예제들 이면에는 훨씬 더 많은 일들이 벌어지고 있다. 이제 Combine의 publishers, subscribers, 구독(subscriptions)의 역할에 대해 자세히 알아볼 때가 되었다.
Understanding what’s going on
백문이 불여일견(picture is worth a thousand words)이다. publishers와 subscribers 간의 상호 작용(interplay)을 설명해 보면 다음과 같다:

이 UML 도표(diagram)를 살펴본다:
- subscriber가 publisher를 구독(subscribes)한다.
- publisher는 구독(subscription)을 만들어 subscriber에게 제공한다.
- subscriber가 값(values)을 요청(requests)한다.
- publisher가 값(values)을 보낸다(sends).
- publisher가 완료(completion)를 보낸다(sends).
Note: 위의 도표는(diagram) 무슨 일이 일어나고 있는지에 대한 간략한(streamlined) 개요(overview)를 제공한다. 여기에서 배우는 것만으로도 Combine을 시작하기에 충분하다. 18장(chapter) "Custom Publishers & Handling Backpressure"에서 이 과정(process)을 더 깊이 이해하게 될 것이다.
Publisher프로토콜(protocol)과 가장 중요한 확장(extensions)중 하나를 살펴본다:public protocol Publisher { associatedtype Output //publisher가 생성하는 값의 유형 associatedtype Failure : Error //publisher가 발생시킬 수 있는 오류의 유형 //오류가 생성되지 않는다는 것이 보장되는 경우에는 Never를 사용할 수 있다. func receive<S>(subscriber: S) where S: Subscriber, Self.Failure == S.Failure, Self.Output == S.Input //subscribe(_:)의 실제 구현은 receive(subscriber:)를 호출하여 subscriber를 publisher에 연결한다. //즉 구독을 만든다. } extension Publisher { public func subscribe<S>(_ subscriber: S) where S : Subscriber, Self.Failure == S.Failure, Self.Output == S.Input //subscriber는 publisher에서 subscribe(_:)를 호출하여 이를 구독한다. }associated types은 구독(subscription)을 만들기 위해, subscriber가 일치시켜야 하는 publisher의 인터페이스(interface)이다.
이번에는
Subscriber프로토콜(protocol)을 살펴본다:public protocol Subscriber: CustomCombineIdentifierConvertible { associatedtype Input //subscriber가 받을 수 있는 값의 유형 associatedtype Failure: Error //subscriber가 받을 수 있는 오류의 유형 //subscriber가 오류를 수신하지 않는 경우에는 Never를 사용할 수 있다. func receive(subscription: Subscription) //다이어그램에서 2번 //publisher는 해당 메서드로 subscriber에게 구독을 전달한다. func receive(_ input: Self.Input) -> Subscribers.Demand //다이어그램에서 4번 //publisher는 해당 메서드로 subscriber에게 방금 게시한 새 값을 보낸다. func receive(completion: Subscribers.Completion<Self.Failure>) //다이어그램에서 5번 //publisher는 해당 메서드로 정상적 혹은 오류로 완료되었음을 알린다. }구독(subscription)으로 publisher와 subscriber를 연결한다.
Subscription프로토콜(protocol)은 다음과 같다:public protocol Subscription: Cancellable, CustomCombineIdentifierConvertible { func request(_ demand: Subscribers.Demand) //subscriber는 해당 메서드를 호출하여 최대 혹은 무제한까지 더 많은 값을 받을 의사가 있음을 알려준다. }Note: subscriber가 받을 수 있는 값(values)의 수를 명시하는 개념(concept)을 backpressure management라고 한다. 이것이나 다른 전략(strategy)이 없다면, subscriber는 처리(handle)할 수 있는 것보다 더 많은 값을 publisher로부터 받아 문제가 발생할 수 있다. Backpressure는 18장(chapter), "Custom Publishers & Handling Backpressure"에서 자세히 다룬다.
Subscriber에서receive(_ :)는Demand를 반환(returns)한다.receive(_ :)에서subscription.request(_ :)를 처음 호출(calling)할 때, subscriber가 수신(received)하려는 값(value)의 최대(max) 개수가 지정되어 있더라도 새 값(value)을 수신 할 때마다 최대 개수를 조정할 수 있다.Note:
Subscriber.receive(_ :)에서max를 조정하는 것은 부가적인 것이다. 즉, 새로운max값이 현재(current)max에 추가(added)된다. 값의 최대 개수는 양수(positive)여야하며, 음수를 전달하면fatalError가 발생한다. 다시 말해, 새 값을 받을 때마다 원래(original) 값의 최대 개수를 늘릴 수는 있지만, 줄일 수는 없다는 뜻이다.Creating a custom subscriber
방금 배운 내용을 연습할 시간이다. 이 새로운 예제를 playground에 추가한다:
example(of: "Custom Subscriber") {
    let publisher = (1...6).publisher
    //range publisher를 사용하여, 정수형의 publisher를 생성한다.

    final class IntSubscriber: Subscriber { //사용자 정의 subscriber인 IntSubscriber를 정의한다.
        typealias Input = Int
        typealias Failure = Never
        //type aliase로 정수를 Input으로 수신하고, Never을 오류로 수신(오류가 발생하지 않음)하는 것을 구현한다.

        func receive(subscription: Subscription) { //publisher가 구독을 전달하기 위해 호출하는 메서드
            subscription.request(.max(3))
            //subscriber는 구독시 최대 3개의 값을 수신한다.
        }

        func receive(_ input: Int) -> Subscribers.Demand { //publisher가 게시한 새 값을 보낼때 호출하는 메서드
            print("Received value", input) //수신한 각 값을 출력한다.
            return .none //subscriber가 수요를 조정하지 않음을 나타낸다.
            //.max(0)와 같다.
        }

        func receive(completion: Subscribers.Completion<Never>) { //publisher가 완료(혹은 오류)되었을 때 호출하는 메서드
            print("Received completion", completion) //완료 이벤트를 출력한다.
        }
    } //Subscriber 프로토콜은 반드시 이 5가지를 구현해야 한다.
}
publisher가 어떤 것을 게시(publish)하려면, subscriber가 필요하다. 예제의 끝에 다음을 추가한다:
let subscriber = IntSubscriber() //subscriber 생성
//publisher의 Output과 Failure이 일치해야 한다.

publisher.subscribe(subscriber) //publisher에게 subscriber를 구독하도록 한다.
playground를 실행(run)한다. 콘솔에 다음과 같은 내용이 출력된 것을 볼 수 있다:
——— Example of: Custom Subscriber ———
Received value 1
Received value 2
Received value 3완료 이벤트(completion event)를 수신하지 못했다. publisher에는 한정된(finite) 수의 값(values)이 더 있지만, 수요(demand)를
.max(3)로 지정했기 때문이다.사용자 지정(custom) subscriber의
receive(_ :)에서.none을.unlimited로 변경하여receive(_ :)메서드를 다음과 같이 되도록 변경한다:func receive(_ input: Int) -> Subscribers.Demand { print("Received value", input) return .unlimited //무제한 //이전에 수신 값의 최대 개수를 3으로 지정했지만, 여기서 변경될 수 있다. }playground을 다시 실행한다. 이번에는 완료 이벤트(completion event)와 함께 모든 값이 수신되고 출력되는 것을 볼 수 있다:
——— Example of: Custom Subscriber ———
Received value 1
Received value 2
Received value 3
Received value 4
Received value 5
Received value 6
Received completion finished.unlimited를.max(1)로 변경하고 playground를 다시 실행해 본다.이벤트(event)를 수신(receive)할 때마다,
max를1씩 늘리도록 지정하기 때문에,.unlimited를 반환했을 때와 동일한 결과가 표시된다..max(1)을 다시.none으로 변경하고,publisher를 문자열(String) 배열(array)로 변경한다:let publisher = ["A", "B", "C", "D", "E", "F"].publisherplayground을 실행(run)한다.
subscribe메서드(method)에String및IntSubscriber.Input유형(예 :Int)이 동일해야(equivalent)한다는 오류(error)가 발생한다. publisher의Output과Failure의 관련 유형(associated types)이 publisher의Input과Failure유형(types)과 일치해야 이 둘 사이의 구독(subscription)이 작성되기 때문에 오류가 발생한다.오류를 해결하려면
publisher정의(definition)를 원래의 정수(integers) range로 다시 변경한다.Hello Future
subscriber에게 단일(single) 값(value)을 내보낸(emits) 다음 완료(complete)하는 publisher를
Just로 만든 것처럼,Future를 사용하여 단일(single) 결과(result)를 비동기(asynchronously)적으로 생성(produce)한 다음 완료(complete)할 수 있다. 이 새로운 예제를 playground에 추가한다:example(of: "Future") { func futureIncrement(integer: Int, afterDelay delay: TimeInterval) -> Future<Int, Never> { } }여기에서
Int와Never유형(type)의 future를 반환(returns)하는 팩토리 함수(factory function)를 만든다. 즉, 정수(Int)를 방출(emit)하고 절대(never) 실패(fail)하지 않는다.또한 이 예제에
subscriptions을 저장할 subscriptions 집합(set)을 future에 추가한다. 장기 실행(long-running) 비동기(asynchronous) 작업(operations)의 경우, 구독(subscription)을 저장하지 않으면 현재 코드 범위(scope)가 종료되자마자 구독(subscription)이 취소(cancelation)된다. 해당 Playground의 경우에는 즉시(immediately) 종료된다.다음으로 함수(function) 본문(body)을 채워 future를 만든다:
Future<Int, Never> { promise in
    DispatchQueue.global().asyncAfter(deadline: .now() + delay) {
    //지정한 시간 후에 호출된다.
        promise(.success(integer + 1))
    }
}
이 코드는 future를 정의하여,
delay후 함수 호출자가 지정한 값을 사용하여integer를 증가시키는 promise를 생성한다.Future는 결국 하나의 값(value)을 만들어 완료(finish)하거나 실패(fail)하는 publisher이다. 이는 값(value)이나 오류(error)가 있을 때 클로저(closure)를 호출하여 이를 수행하며, 해당 클로저(closure)를 promise라고 한다.Future를 Command-click하고 Jump to Definition을 선택하면 다음이 표시된다:final public class Future<Output, Failure> : Publisher where Failure: Error { public typealias Promise = (Result<Output, Failure>) -> Void // ... }Promise는Future가 게시(published)한 단일(single) 값(value) 또는 오류(error)를 포함하는Result를 수신하는 클로저(closure)에 대한 별칭(alias)이다.playground로 돌아가
futureIncrement정의 후에 다음 코드를 추가한다:let future = futureIncrement(integer: 1, afterDelay: 3) //3초 지연 후, 전달한 정수(1)를 증가시킨다. 이전에 만든 팩토리함수를 사용하여 future를 생성한다. future //sink로 future를 구독한다. //future는 publisher .sink(receiveCompletion: { print($0) }, //수신한 완료 이벤트를 출력 receiveValue: { print($0) }) //수신한 값 출력 .store(in: &subscriptions) //결과를 subscriptions에 저장한다.이 장(chapter)의 뒷부분에서 컬렉션(collection)에 구독(subscriptions)을 저장(storing)하는 방법에 대해 자세히 설명하므로, 예제의 해당 부분을 완전히 이해하지 못한다 하더라도 걱정하지 않아도 된다.
playground을 실행(run)한다. 예제명이 출력되고 3초 후에 future의 결과가 출력된다:
——— Example of: Future ———
2
finishedplayground에 다음 코드를 입력하여, future에 두 번째 구독(subscription)을 추가한다:
future
    .sink(receiveCompletion: { print("Second", $0) },
        receiveValue: { print("Second", $0) })
    .store(in: &subscriptions)
playground를 실행(run)하기 전에
futureIncrement함수(function)에서DispatchQueue블록 바로 앞에 다음 print 문을 삽입한다:print("Original")playground을 실행(run)한다. 지정된 지연(delay) 이후, 두 번째 구독(subscription)은 동일한 값(value)을 받는다(receives). future는 promise을 다시 실행하지 않는다. 대신, 결과를 공유(shares)하거나 재생(replays)한다.
——— Example of: Future ———
Original
2
finished
Second 2
Second finished또한 구독(subscriptions)이 발생(occur)하기 전에
Original이 출력된다. future는 생성되자마자 즉시 실행되기 때문에 이런 일이 일어난다. 일반 publishers와 같이 subscriber가 필요하지 않다(일반 publishers는 subscriber가 구독을 해야 이벤트가 발생한다).지난 몇 가지 예제에서는 게시할(publish) 값(values)이 유한(finite)한 publishers를 사용하여, 순차적(sequentially)이고 동기적(synchronously)으로 게시(published)했다.
알림(notification) 센터(center) 예제는 다음과 같이, 값(values)을 무기한(indefinitely) 및 비동기적(asynchronously)으로 게시(publishing)할 수 있는 publisher의 예이다:
- 기본(underlying) 알림(notification) 발신자(sender)가 알림(notifications)을 보낸다(emits).
- 지정된(specified) 알림(notification)에 subscribers가 있다.
자신(own)의 코드를 작성하여 동일한 작업을 수행 할 수 있는 방법이 있다. 계속 진행하기 전에 전체 "Future" 예제를 주석 처리하여 playground를 실행할 때마다 future가 호출되지 않도록 한다. 그렇지 않으면 지연된(delayed) 출력(output)이 마지막 예제 이후에 인쇄될 것이다.
Hello Subject
publishers와 subscribers를 사용하여 작업하는 방법과 자신만의 subscribers를 만드는 방법까지 학습했다. 이 책의 후반부에서 사용자 지정(custom) publishers를 만드는 방법을 배울 것이다. 하지만 지금은 배워야할 몇 가지 내용이 더 있다. 먼저 subject이다.
subject는 Combine이 아닌 코드가 Combine의 subscribers에게 값(values)을 보낼(send) 수 있도록 중간 역할(go-between)을 한다.
새로운 예제를 playground에 추가한다:
example(of: "PassthroughSubject") {
    enum MyError: Error { //커스텀 오류 유형을 정의한다.
        case test
    }

    final class StringSubscriber: Subscriber { //커스텀 Subscriber를 정의한다.
        typealias Input = String //문자열 수신
        typealias Failure = MyError //MyError 오류 수신

        func receive(subscription: Subscription) { //publisher가 구독을 전달하기 위해 호출하는 메서드
            subscription.request(.max(2))
        }

        func receive(_ input: String) -> Subscribers.Demand { //publisher가 게시한 새 값을 보낼때 호출하는 메서드
            print("Received value", input)
            return input == "World" ? .max(1) : .none
            //받은 값에 따라 demand를 조정한다.
        }

        func receive(completion: Subscribers.Completion<MyError>) { //publisher가 완료(혹은 오류)되었을 때 호출하는 메서드
            print("Received completion", completion)
        }
    }

    let subscriber = StringSubscriber() //StringSubscriber 인스턴스 생성
}
입력이
"World"일 때receive(_ :)에서.max(1)을 반환하면 새로운 값의 최대 개수는3(원래 max +1)로 설정된다.사용자 정의(custom) 오류(error) 유형(type)을 정의하고, 수신된(received) 값을 사용하여 수요(demand)를 조정하는 것 외에는 새로운 것이 없다. 흥미로운 부분은 다음 부분들이다.
예제에 코드를 추가한다:
let subject = PassthroughSubject<String, MyError>()
//<String, MyError> 타입의 PassthroughSubject 생성

subject.subscribe(subscriber) //subject에 구독한다. //첫 번째 구독

let subscription = subject
    .sink( //sink를 사용해 구독을 생성한다. //두 번째 구독
        receiveCompletion: { completion in
            print("Received completion (sink)", completion)
        },
        receiveValue: { value in
            print("Received value (sink)", value)
        }
    )
Passthrough subjects를 사용하면, 필요에 따라(on demand) 새 값을 게시(publish)할 수 있다. Passthroughsubjects는 값(values)과 완료 이벤트(completion event)를 전달할 것이다. 다른 publisher와 마찬가지로 subject는 내보내는(emit) 값(values)과 오류(errors)의 유형을 선언(declare)해야 한다. subscribers가 해당 passthrough subject를 구독(subscribe)하려면, 해당 유형을 입력(input)과 실패(failure) 유형(types)과 일치시켜야 한다.
값(values)을 보낼(send) 수 있는 passthrough subject과 이를 받을(receive) 수 있는 구독(subscriptions)을 만들었으므로, 이제 값을 보내야(send) 한다. 예제에 다음 코드를 추가한다:
subject.send("Hello")
subject.send("World")
subject의
send메서드(method)를 사용하여, 한 번에 하나씩 두 개의 값(values)을 보낸다.playground을 실행(run)한다. 다음과 같은 출력을 확인할 수 있다:
——— Example of: PassthroughSubject ———
Received value Hello
Received value (sink) Hello
Received value World
Received value (sink) World각 subscriber는 게시(published)된 값(values)을 받는다(receives).
다음 코드를 추가한다:
subscription.cancel() //두 번째 구독을 취소한다.
subject.send("Still there?") //다른 값을 보낸다.
playground을 실행(run)한다. 두 번째 subscriber의 구독(subscription)을 취소(canceled)했기 때문에, 예상대로 첫 번째 subscriber만 값(value)을 받는다:
——— Example of: PassthroughSubject ———
Received value Hello
Received value (sink) Hello
Received value World
Received value (sink) World
Received value Still there?아래 코드를 예제에 추가한다:
subject.send(completion: .finished) //완료
subject.send("How about another one?")
playground을 실행(run)한다. 두 번째 subscriber는 값(value)이 전송되기 직전에 완료 이벤트(completion event)를 수신하므로,
"How about another one?"라는 메시지를 받지 못한다. 첫 번째 subscriber는 이전에 구독(subscription)이 취소(canceled)되었으므로, 완료 이벤트(completion event)와 메시지를 모두 수신하지 못한다.——— Example of: PassthroughSubject ———
Received value Hello
Received value (sink) Hello
Received value World
Received value (sink) World
Received value Still there?
Received completion finished완료 이벤트(completion event)를 전송하는 행 바로 앞에 다음 코드를 추가한다.
subject.send(completion: .failure(MyError.test))playground를 다시 실행한다. 콘솔(console)에 다음과 같이 출력된 것을 볼 수 있다:
——— Example of: PassthroughSubject ———
Received value Hello
Received value (sink) Hello
Received value World
Received value (sink) World
Received value Still there?
Received completion failure(...MyError.test)Note: 실제 오류(error) 출력은 더 길다. 위에서는 축약(abbreviated)하여 표시했다.
첫 번째 subscriber가 오류(error)를 수신하지만, 오류 후에 전송(sent)된 완료 이벤트(completion event)는 수신되지 않는다. 이는 publisher가 완료(completion)든 오류(error)든 하나의(single) 완료 이벤트(completion event)를 보내면 최종적으로 종료(done)된다는 것을 보여준다.
PassthroughSubject를 사용하여 값(values)을 전달하는 것은, 명령형(imperative) 코드를 선언적(declarative)인 Combine 세계에 연결(bridge)하는 한 가지 방법이다. 그러나 때로는 명령형(imperative) 코드에서 publisher의 현재(current) 값(value)을알고 싶을 수도 있다. 이와 같은 상황에 적절한CurrentValueSubject가 있다.각 구독(subscription)을 값(value)으로 저장(storing)하는 대신,
AnyCancellable컬렉션(collection)에 여러 구독(subscriptions)을 저장할 수 있다. 그러면 컬렉션(collection)이 해제(deinitialized)될 때, 컬렉션(collection)에 추가된 각 구독을 자동으로(automatically) 취소(cancel)한다.새로운 예제를 playground에 추가한다:
example(of: "CurrentValueSubject") {
    var subscriptions = Set<AnyCancellable>() //subscriptions 집합 생성

    let subject = CurrentValueSubject<Int, Never>(0) //<Int, Never> 유형의 CurrentValueSubject 생성
    //정수가 게시되고, error는 발생하지 않으며 초기 값은 0이 된다.

    subject
        .sink(receiveValue: { print($0) }) //subject에 대한 구독을 생성한다. 값을 출력
        .store(in: &subscriptions) //구독을 subscriptions 집합에 저장한다.
        //동일하게 업데이트 되도록 사본 대신 inout 매개변수를 사용해 원본을 전달한다.
}
current value subjects를 초기(initial) 값(value)으로 초기화(initialize)해야 한다. 새 subscribers는 즉시 해당 값(value) 또는 subject에서 게시(published)된 최신(latest) 값(value)을 얻는다. playground을 실행(run)하여 실제로 작동하는지 확인한다:
——— Example of: CurrentValueSubject ———
0이제 아래 코드를 추가하여 두 개의 새 값(values)을 내보낸다:
 subject.send(1)
 subject.send(2)
playground를 다시 실행한다. 값(values)이 수신(received)되어 콘솔(console)에 출력된다:
1
2passthrough subject와 달리, 언제든지 current value subject에 값(value)을 요청(ask)할 수 있다. 다음 코드를 추가하여 subject의 현재(current) 값(value)을 출력한다:
print(subject.value)subject의 유형(type) 이름으로 유추(inferred)할 수 있듯이,
value속성(property)에 접근(accessing)하여 현재(current) 값(value)을 얻을 수 있다. playground를 실행하면,2가 출력된 것을 확인할 수 있다.current value subject에서
send(_:)를 호출(calling)하는 것은 새로운 값(value)를 보내는(send) 한 가지 방법이다. 또 다른 방법은value속성(property)에 새 값(value)을 할당(assign)하는 것이다. 다음 코드를 추가한다:subject.value = 3 print(subject.value)playground을 실행(run)한다. subscriber가 값을 받았을 때, 그리고
value을 subject에 추가 한 후 출력했을 때 각각2와3을 두 번씩 출력한다.다음으로, 이 예제의 마지막에 current value subject에 대한 새 구독(subscription)을 생성한다:
subject
    .sink(receiveValue: { print("Second subscription:", $0) }) //구독 생성
    .store(in: &subscriptions) //저장
여기에서 구독(subscription)을 작성하고, 수신(received)된 값(values)을 인쇄한다. 또한 해당 구독(subscription)을
subscriptions집합(set)에 저장한다.앞서 말했듯이,
subscriptions집합(set)은 추가된 구독(subscriptions)을 자동으로(automatically) 취소(cancel)할 수 있다. 이를 확인하기 위해print()연산자(operator)를 사용하면, 모든 게시(publishing)된 이벤트(events)를 콘솔(console)에 출력할 수 있다.subject와sink사이의 각 구독(subscriptions)에print()연산자를 삽입(insert)한다. 각 구독(subscription)의 시작은 다음과 같아야 한다:subject .print() .sink...playground를 다시 실행하면, 전체 예제에 대해 다음과 같은 결과를 확인할 수 있다:
——— Example of: CurrentValueSubject ———
receive subscription: (CurrentValueSubject)
request unlimited
receive value: (0)
0
receive value: (1)
1
receive value: (2)
2
2
receive value: (3)
3
3
receive subscription: (CurrentValueSubject)
request unlimited receive value: (3)
Second subscription: 3
receive cancel
receive cancel각 이벤트(event)는 구독(subscription) 처리기(handlers)에서 출력되는 값(value)과 subject의
value가 함께 출력된다. subscriptions 집합(set)이 해당 예제 범위(scope) 내에서 정의(defined)되었기 때문에, 해제(deinitialized)시 포함(contains)된 구독(subscriptions)을 취소(cancels)하면서receive cancel이 출력된다(취소된 것이므로, 완료 이벤트가 호출되지는 않는다.).value속성(property)에 완료(complete) 이벤트(event)를 할당(assign)할 수 있는지 궁금할 것이다. 이 코드를 추가하여 사용한다:subject.value = .finished //Error오류(error)가 발생한다.
CurrentValueSubject의value속성(property)은 값(values)만을 의미한다. 완료(completion) 이벤트(events)는 여전히send(_:)을 사용하여 전송해야 한다. 잘못된 코드를 다음과 같이 변경한다:subject.send(completion: .finished)playground를 다시 실행(run)한다. 이번에는 다음과 같은 출(output)력이 표시된다:
receive finished
receive finished두 구독(subscriptions) 모두 취소(cancel) 이벤트(event) 대신 완료(completion) 이벤트(event)를 받는다. 완료(finished)되었으므로 더 이상 취소(canceled)할 필요가 없다.
Dynamically adjusting demand
앞서
Subscriber.receive(_:)의 수요(demand)를 조정(adjusting)하는 것은 부가적(additive)이라는 것을 배웠다. 이제 그것이 어떻게 작동하는지 좀 더 정교한 예제로 자세히 살펴본다. 새로운 예제를 playground에 추가한다:example(of: "Dynamically adjusting Demand") { final class IntSubscriber: Subscriber { typealias Input = Int //값 타입 Int typealias Failure = Never //오류 타입 Never func receive(subscription: Subscription) { //publisher가 구독을 전달하기 위해 호출하는 메서드 subscription.request(.max(2)) } func receive(_ input: Int) -> Subscribers.Demand { //publisher가 게시한 새 값을 보낼때 호출하는 메서드 print("Received value", input) switch input { case 1: return .max(2) //새로운 max는 4가 된다(원래 max 2 + 새 max 2). case 3: return .max(1) //새로운 max는 5가 된다(이전 max 4 + 새 max 1). default: return .none //max는 5가 된다(이전 max 4 + 새 max 0). } } func receive(completion: Subscribers.Completion<Never>) { //publisher가 완료(혹은 오류)되었을 때 호출하는 메서드 print("Received completion", completion) } } let subscriber = IntSubscriber() let subject = PassthroughSubject<Int, Never>() subject.subscribe(subscriber) subject.send(1) subject.send(2) subject.send(3) subject.send(4) subject.send(5) subject.send(6) }코드의 대부분은 이전에 작업한 예제와 유사하므로 receive(_:) 메서드(method)를 설명하는 데 중점을 둔다. 사용자 지정(custom) subscriber에서 지속적으로 수요(demand)를 조정(adjust)한다.
playground을 실행(run)하면 다음과 같이 표시된다:
——— Example of: Dynamically adjusting Demand ———
Received value 1
Received value 2
Received value 3
Received value 4
Received value 5예상대로 5개의 값(values)이 배출(emitted)되었지만, 6번째 값은 출력되지 않는다.
계속 진행하기 전에, 알아야 할 중요한 사항이 하나 더 있다. subscribers에서 publisher에 대한 세부 사항이 숨겨진다는 것이다.
Type erasure
subscribers가 해당 publisher에 대한 추가 세부 정보에 접근(access)할 수 없는 상태에서, publisher로부터 이벤트(events)를 받도록(receive) 구독하도록(subscribe) 하려는 경우가 있다.
이를 잘 설명하는 새로운 예제를 살펴본다:
example(of: "Type erasure") { let subject = PassthroughSubject<Int, Never>() //passthrough subject를 생성한다. let publisher = subject.eraseToAnyPublisher() //subject에서 type-erased publisher를 생성한다. publisher .sink(receiveValue: { print($0) }) //구독 .store(in: &subscriptions) //저장 subject.send(0) //passthrough subject에 새 값을 전달한다. }publisher를 Option-click하면AnyPublisher<Int, Never>유형(type)임을 알 수 있다.AnyPublisher는Publisher프로토콜(protocol)을 준수하는 type-erased 구조체(struct)이다. Type erasure를 사용하면 subscribers 또는 downstream publishers에게 노출하지 않으려는 publisher에 대한 세부 정보를 숨길 수 있다. 이에 대한 자세한 정보는 다음 섹션(session)에서 설명한다.이전의 또 다른 유형의 삭제(erasure) 사례를 보았기 때문에 데자뷰(déjà vu)를 느낄 수도 있다.
AnyCancellable은Cancellable을 준수하는 type-erased 클래스(class)로, 호출자(callers)가 기본(underlying) 구독(subscription)에 접근(access)하지 않고도 구독(subscription)을 취소(cancel)하여 더 많은 항목(items)을 요청(request)하는 등의 작업을 수행할 수 있도록 한다.publisher에 대해 type erasure를 사용하는 경우의 한 가지 예는, public 및 private 속성(properties) 쌍(pair)을 사용하여 해당 속성(properties)의 소유자(owner)가 private publisher에게 값(values)을 보낼 수 있도록 허용하고, 외부(outside) 호출자(callers)가 구독(subscribing)을 위해 public publisher만 접근할 수 있도록 허용하지만, 값(values)을 보낼 (send)수 없게 하는 경우이다.
AnyPublisher에는send(_:)연산자(operator)가 없으므로, 새 값(values)을 해당 publisher에 추가할 수 없다.eraseToAnyPublisher()연산자(operator)는 제공된 publisher를AnyPublisher인스턴스(instance)에 래핑(wraps)하여 publisher가 실제로는PassSubSubject라는 사실을 숨긴다.Publisher프로토콜(protocol)을 특수화(specialize)할 수 없기 때문에 필요하다(e.g. : 유형을Publisher<UIImage, Never>으로 정의할 수 없다).publisher를 type-erased로 제공할 때, 새 값(values)을 보낼 수 없다는 것을 확인하려면 아래 코드를 예제에 추가한다.publisher.send(1) //원래 PassthroughSubject는 send 연산자를 사용할 수 있다. //하지만 let publisher = subject.eraseToAnyPublisher() 에서 //Type erasure되었기 때문에 send를 사용할 수 없다.Value of type 'AnyPublisher<Int, Never>' has no member 'send'.라는 오류(error)가 표시된다. 다음 단계로 넘어가기 전에 해당 코드를 주석(comment) 처리한다.Challenge
다운로드한 파일에서 시작(starter) 및 최종(final) 버전(versions)을 확인할 수 있다.
Challenge: Create a Blackjack card dealer
챌린지(challenge) 폴더(folder)에서 Starter.playground를 열고, 프로젝트 탐색기(Project navigator)에서 playground 페이지(page)의 소스(Sources)를 확인한다. SupportCode.swift를 선택한다.
이 과제(challenge)에 대한 도우미(helper) 코드에는 다음과 같은 내용을 포함하고 있다.
- 표준 카드 덱(deck)을 나타내는 52개의 튜플(tuples)을 포함하는
cards배열(array). - 두 가지 유형(type)의 별칭(aliases) :
Card는String과Int의 튜플(tuple)이며,Hand는Card의 배열(array)이다. Hand의 두 가지 도우미(helper) 속성(properties) :cardString과points.HandError오류(error) 열거형(enumeration).
기본(main) playground 페이지(page)에서
// Add code to update dealtHand here주석(comment) 바로 아래에 hand의points속성(property)에서 반환(returned)된 결과(result)를 평가(evaluates)하는 코드를 추가한다. 결과(result)가21보다 크면dealtHandsubject으로HandError.busted를 전송(send)한다. 그렇지 않으면hand의 값(value)을 보낸다(send).또한 기본(main) playground 페이지(page)에서
// Add subscription to dealtHand here주석 바로 다음에dealtHand을 구독(subscribe)하고, 값과 오류를 수신(receiving)하여 처리(handle)한다.값(values)을 수신(received)한 경우에는, hand의
cardString과points속성(properties)의 결과(results)가 포함(containing)된 문자열(string)을 출력한다.오류(error)가 있는 경우라면 이를 출력한다.
receivedCompletion블록(block)에서.finished또는.failure를 수신할 수 있으므로, 해당 완료(completion)가 실패(failure)인지 여부를 구별해야 한다.HandError는CustomStringConvertible을 준수하므로 사용자 친화적(user-friendly)인 오류(error) 메시지를 출력할 수 있다. 다음과 같이 사용할 수 있다:if case let .failure(error) = $0 { print(error) }deal(_:)호출(call)은 현재(currently)3을 전달(passes)하므로, playground를 실행할 때마다 3장의 카드가 처리된다.실제 블랙잭(Blackjack) 게임은 처음에 두 장의 카드를 받고, 블랙잭(blackjack, 카드의 숫자 합이 정확히 21이 되는 상태로 플레이어가 승리한다) 또는 버스트(bust, 카드의 숫자 합이 21을 초과하는 상태로 플레이어가 패배한다)가 될 때까지 하나 이상의 추가 카드를 선택해야 하며 이를 hits이라 한다(카드의 숫자 합이 21 또는 21에 가깝게 만들면 승리하고, 21을 초과하면 패배한다). 이 간단한 예제에서는 3장의 카드를 바로 얻는다.
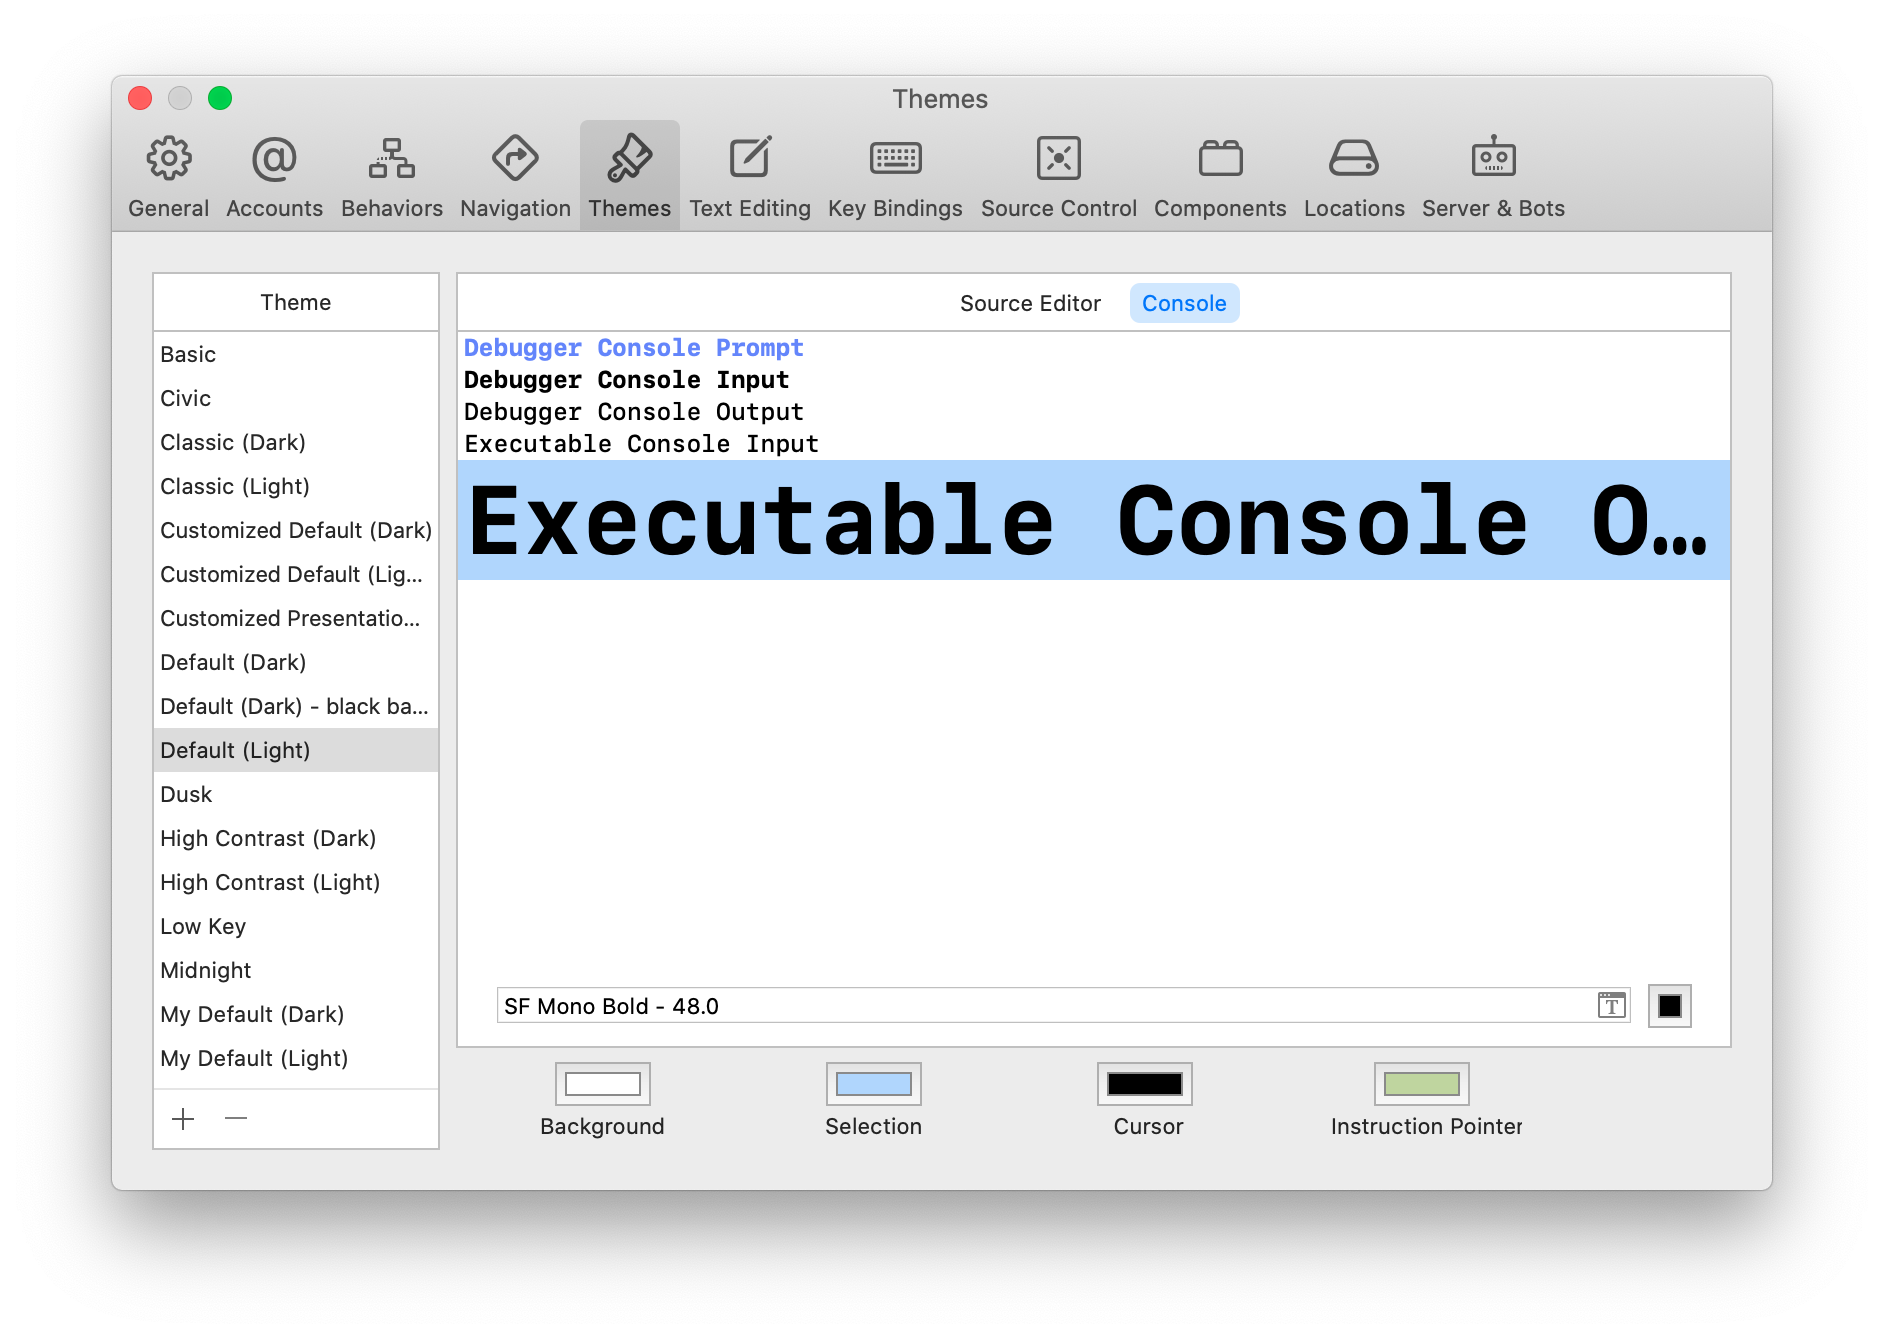
카드의 이모지(emoji)가 콘솔(console)에 출력될 때, 너무 작아 보일 수 있다. 실행 콘솔 출력(Executable Console Output)의 글꼴 크기(font size)를 일시적으로(temporarily) 늘릴 수 있다. 그렇게 하려면 Xcode ▸ Preferences... ▸ Themes/Console을 선택한다. 그런 다음 Executable Console Output을 선택하고, 오른쪽 하단의 T 버튼(button)를 클릭하여 48과 같이 더 큰 글꼴로 변경한다.
Solution
이 과제(challenge)를 완료하기 위해, 추가해야할 두 가지가 있었다. 첫 번째는
deal함수(function)에서dealtHandpublisher를 업데이트(update)하여 hand의 points를 확인(checking)하고, 21 초과인 경우 오류(error)를 보내(sending)는 것이다:// Add code to update dealtHand here if hand.points > 21 { //21을 초과하면 오류(플레이어 패배) dealtHand.send(completion: .failure(.busted)) } else { dealtHand.send(hand) }다음으로
dealtHand를 구독(subscribe)하고, 수신된(received) 값(value) 또는 완료(completion) 이벤트(event)가 오류(error)인 경우 이를 출력해야 한다:_ = dealtHand .sink(receiveCompletion: { //완료 if case let .failure(error) = $0 { //오류인 경우 print(error) } }, receiveValue: { hand in //값 수신 print(hand.cardString, "for", hand.points, "points") })playground을 실행(run)할 때마다, 다음과 유사한 새로운 hand와 출력이 나온다:
——— Example of: Create a Blackjack card dealer ———
🃝🂩🃒 for 21 pointsKey points
- publishers는 하나 이상의 subscribers에게 시간 경과에 따라 일련(sequence)의 값(values)을 동기적(synchronously) 또는 비동기적(asynchronously)으로 전송(transmit)한다.
- subscriber는 값(values)을 받기(receive)위해 publisher를 구독(subscribe)할 수 있다. 그러나 subscriber의 입력(input)과 실패(failure) 유형(types)은 publisher의 출력(output)과 실패(failure) 유형(types)과 일치(match)해야 한다.
- publishers를 구독(subscribe)하는 데 사용할 수 있는 기본(built-in) 연산자(operators)는
sink(_:_:)와assign(to:on:)이다. - subscriber는 값(value)를 받을(receives) 때마다, 값(value)에 대한 수요(demand)를 증가시킬 수 있지만 반대로 감소시킬 수는 없다.
- 리소스(resources)를 확보하고 원치 않는(unwanted) 부작용(side effects)을 방지하려면, 완료(done)시 각 구독(subscription)을 취소(cancel)해야 한다.
- 해제(deinitialization)시 자동(automatic) 취소(cancelation)를 수신(receive)하기 위해
AnyCancellable인스턴스(instance) 또는 컬렉션(collection)에 구독(subscription)을 저장(store)할 수도 있다. - future는 나중에 단일(single) 값(value)을 비동기(asynchronously)로 수신(receive)하는 데 사용할 수 있다.
- subjects는 외부(outside) 호출자(callers)가 시작 값(value)의 유무에 관계없이, subscribers에게 여러(multiple) 값(values)을 비동기(asynchronously)로 보낼 수있는 publishers이다.
- type erasure는 발신자(callers)가 기본(underlying) 유형(type)의 추가 세부 정보에 접근(access)할 수 없도록 한다.
print()연산자(operator)를 사용하여, 모든 게시(publishing) 이벤트(events)를 콘솔(console)에 출력하고 진행 상황을 확인할 수 있다.
'Raywenderlich > Combine: Asynchronous Programming' 카테고리의 다른 글
Chapter 6: Time Manipulation Operators (0) 2020.07.27 Chapter 5: Combining Operators (0) 2020.07.20 Chapter 4: FilteringOperators (0) 2020.07.17 Chapter 3: TransformingOperators (0) 2020.07.15 Chapter 1: Hello, Combine! (0) 2020.07.02