-
How To Secure iOS User Data: Keychain Services and Biometrics with SwiftUIRaywenderlich/Articles 2020. 12. 13. 20:02
How To Secure iOS User Data: Keychain Services and Biometrics with SwiftUI
Learn how to integrate keychain services and biometric authentication into a simple password-protected note-taking SwiftUI app.
www.raywenderlich.com
Version
Swift 5, iOS 13, Xcode 11
Apple의 키체인 서비스(Keychain Services)는 비밀번호(passwords), 암호화 키(encryption keys), 사용자 토큰(user tokens)과 같은 작고 민감한(sensitive) 데이터를 안전(secure)하고 보호(protected)된 방식(manner)으로 저장(storing)하기 위한 메커니즘(mechanism)이다. 키체인 서비스(Keychain Services)를 사용하면, 데이터를 위험(risk)에 빠뜨리지 않고 사용자가 입력(entering)한 비밀번호(password)가 저장된(stored) 비밀번호(password)와 일치(matches)하는지 확인(check)할 수 있다. 그러나(however), 비밀번호(password)를 입력(entering)하는 것은 지루한(tedious) 일이다. 이 문제(problem)를 해결(solve)하기 위해, Apple은 많은 기기(devices)에 생체(biometric) 인증(authentication)을 추가했다. 생체(biometric) 인증(authentication)은 사용자(users)가 지문(fingerprint)이나 얼굴 스캔(face scan)을 사용하여 빠르고(quickly) 안전(securely)하게 신원(identity)을 확인(confirm)할 수 있게 해준다.
이 튜토리얼(tutorial)에서는 키체인 서비스(Keychain Services)와 생체 인증(biometric authentication)을 간단한 비밀번호로 보호된(simple password-protected) 메모 작성(note-taking) SwiftUI 앱(app)에 통합(integrate)하는 방법을 알아본다.
Getting Started
튜토리얼(tutorial) 상단(top) 또는 하단(bottom)에 있는 Download Materials 버튼(button)을 클릭(clicking)하여 시작 프로젝트(starter project)를 다운로드(download)한다.
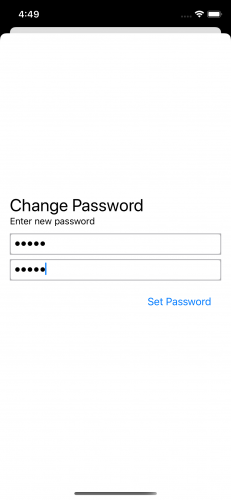
시작 프로젝트(starter project)를 열어, 빌드(build)하고 실행(run)한다. 처음 실행(run)하면, 앱(app)은 메모(note)를 보호(protect)하기 위해 비밀번호(password)를 입력하라는 메시지를 표시(prompts)한다. 계속해서 두 필드(fields)에 비밀번호(password)를 입력(type)하고 Set Password를 탭(tap)한다. 텍스트(text)를 입력(enter)하고 나중에 다시 볼 수 있는 간단한 메모 작성(note-taking) 앱(app)이 표시된다.
Note: 비밀번호(password)를 잊어(forget)버렸더라도 걱정할 것 없다. 디버그(debug) 빌드(builds)를 실행(running)할 때, 앱(app)을 초기 상태(initial state)로 되돌리는 마법(magical)의 버튼(button)이 있다. 비밀 메모(secret note)는 잃어버리겠지만, 진행이 막히지(stuck)는 않을 것다.
앱(app)은 메모(note)를 관리(manage)하기 위해, UITextView를 래핑(wraps)한다. 편집기(editor) 위에 세 개의 버튼(buttons)이 있다. 가장 왼쪽(far left)에는 위에서 언급(mentioned)한 재설정(reset) 버튼(button)인 휴지통(trash can) 버튼(button)이 있다. 오른쪽에는 비밀번호(password) 변경(changing) 버튼(button)과 메모(note) 잠금(locking) 및 잠금 해제(unlocking) 버튼이 있다. 방금 새 비밀번호(password)를 입력(entered)했으므로, 메모(note)가 잠금 해제(unlocked)되고 편집(editing)할 준비가 되었다. 텍스트 편집기(text editor)에 텍스트(text)를 입력(type)한다.

이제 앱(app)을 중지(stop)하고 다시 시작(restart)한다. 메모(note)가 잠긴(locked) 상태로 앱(app)이 시작된다. 내용(contents)을 가리기(obscure) 위해 편집기(editor) 창(window)이 흐리게(blurred) 표시된다. 잠금(lock) 버튼(button)을 누르고(tap), 이전에 설정(set)한 비밀번호(password)를 입력(enter)하여 메모(note)를 잠금 해제(unlock)한다. 앱(app)은 User Defaults를 사용하여, 메모(note)와 비밀번호(password)를 저장(store)한다.
이렇게 하면 기기(device)에 물리적(physical)으로 접근(access)할 수 있는 공격자(attacker)가 비밀번호(password)를 쉽게 찾을(locate) 수 있다. 키체인 서비스(Keychain Services)는 비밀번호(password)를 저장(store)할 더 안전한(safer) 장소(place)를 제공(provides)한다. 다음 섹션(section)에서는 이 작업을 수행하기 위한 앱(app) 업데이트(update)를 시작한다.
A Look at Keychain Services
키체인 서비스(Keychain Services)는 운영 체제(operating system)에서 관리(managed)하는 암호화(encrypted)된 데이터베이스(database)를 제공(provides)한다. 비밀번호(passwords), 암호화 키(cryptographic keys), 인증서(certificates) 또는 어떤 작은(short piece) 데이터를 저장(storing)하기 위한 것이다.
키체인(keychain)에 무언가를 저장(store)하려면, 비밀 정보(secret information)와 함께 데이터에 대한 몇 가지(several) 속성(attributes)을 패키징(package)한다. 이를 키체인(keychain) 항목(item)에 모두 함께 저장(store)한다. 키체인 서비스(Keychain Services)는 다양한(different) 유형(types)의 항목(items)에 대한 클래스(classes)를 제공(provides)한다:
kSecClassInternetPassword는 인터넷 사이트(internet site)의 비밀번호(password)를 저장(stores)한다.kSecClassGenericPassword는 모든(any) 유형(type)의 비밀번호(password)를 저장(stores)한다.kSecClassCertificate는 인증서(certificate)를 저장(stores)한다.kSecClassKey는 암호화 키(cryptographic key) 항목(item)을 저장(stores)한다.kSecClassIdentity는 ID(identity)를 저장(stores)한다.
각 클래스(class)는 다른(different) 속성(attributes) 세트를 사용한다. 이러한 속성(attributes)은 보안(secured) 항목(item)을 식별(identify)하는 데 필요한 정보(information)를 정의(define)한다. 또한, 비밀 정보(secret information)에 대한 접근(access)을 제어(control)한다. 속성(attributes)을 사용하여 나중에 항목(item)을 검색(search for)할 수 있으며, 필요한 경우 앱(apps)간에 키체인(keychain)을 공유(share)할 수도 있다.

Keychain Services API는 오랫동안 사용되어 왔다(has been around a long time). 즉, 정보(information)를 저장(store)할 수 있는 증명(proven)되고 신뢰할(reliable) 수 있는 안전한(safe) 장소라는 의미이다. 하지만 불행히도(unfortunately) C로 작성(written for)된 API를 다룬다(deal with)는 의미이기도 하다.
하지만 당황할 것 없다(don’t panic). 보다 현대적인 방식(modern fashion)으로 API를 처리(deal with)할 수 있도록, 래퍼(wrapper) 함수(functions)를 작성(write)할 것이다.
Enabling Your Keychain
이제 키체인(keychain)을 설정(set up)할 때이다. 안전하게 비밀번호(password)를 추가(add), 가져오기(retrieve), 업데이트(update), 삭제(delete)할 수 있도록 앱(app)을 개선(enhance)한다.
Adding a Password to the Keychain
시작 프로젝트(starter project)의 Models 그룹(group)에서 KeychainServices.swift를 연다. 사용자(user)에게 피드백(feedback)을 제공(provide)하는 데 사용할, 사용자 정의(custom)
Error인KeychainWrapperError에 대한 정의(definition)를 확인할 수 있다.가장 먼저 추가(add)할 것은
KeychainWrapper의 초기(initial) 정의(definition)이다. 파일(file) 끝의KeychainWrapperError뒤에 다음 코드를 삽입(insert)한다:class KeychainWrapper { func storeGenericPasswordFor( account: String, service: String, password: String ) throws { guard let passwordData = password.data(using: .utf8) else { print("Error converting value to data.") throw KeychainWrapperError(type: .badData) } } }먼저 비밀번호(password)를
String에서Data로 변환(convert)해야 한다. 변환(conversion)이 실패(fails)하면 오류(error)를 발생(throw)시킨다.Note: 코드를 추가하면, 상수(constants)에 대해 "defined but never used" 경고(warnings)가 표시된다:

걱정할 것 없다. 나중에 이 튜토리얼(tutorial)에서 이러한 경고(warnings)를 해결(resolve)할 것이다. 지금은 무시(ignore)할 수 있다.
키체인 서비스(Keychain Services)에 대한 접근(access)은 쿼리(query)를 사용해 작동한다. 키체인 서비스(Keychain Services)에 접근(accessing)하는 첫 번째 단계(step)는 추가 쿼리(add query)를 만드는 것이다. 이름에서 알 수 있듯이(implies), 추가 쿼리(add query)는 키체인(keychain)에 저장(store)하려는 데이터를 정의(defines)한다.
storeGenericPasswordFor(account:service:password:)의 끝에 다음 코드를 추가(add)한다:let query: [String: Any] = [ //query는 속성에 따라 String을 Any 객체에 매핑하는 dictionary이다. 이 패턴은 Swift에서 C기반 API를 호출할 때 일반적이다. //각 속성에 대해 kSec으로 시작하는 정의된 global constant를 제공한다. 각 경우 constant를 String(실제로는 CFString)으로 캐스팅하고, 해당 속성에 대한 value을 사용한다. kSecClass as String: kSecClassGenericPassword, //첫 번째 key는 미리 정의된 constant인 kSecClassGenericPassword를 사용하여, 이 item에 대한 클래스를 generic password로 정의한다. kSecAttrAccount as String: account, //generic password item의 경우, username 필드인 account을 제공한다. 이는 method에 parameter로 전달했다. kSecAttrService as String: service, //다음으로 password에 대한 service를 설정한다. 이것은 password의 목적을 반영해야 하는 임의의 String이다(ex. "user login"). //이것 역시 method에 parameter로 전달했다. kSecValueData as String: passwordData //마지막으로 method에 전달된 String에서 변환된 passwordData를 사용하여, item에 대한 data를 설정한다. ]이제 쿼리(query)를 작성했으므로, 값(value)을 저장(store)할 준비가 되었다. 쿼리(query)의 정의(definition) 다음에 아래 코드를 추가(add)한다:
let status = SecItemAdd(query as CFDictionary, nil)
//SecItemAdd(_:_:)는 Keychain Services에 keychain 정보를 추가하도록 요청한다.
//query를 예상 CFDictionary type으로 캐스팅한다. C API는 종종 return value를 사용하여 함수의 결과를 표시한다. 여기서 value는 OSStatus type이다.
switch status {
//status code의 다양한 value에 대한 switch를 작성한다.
//하나의 value만 확인하는 switch를 사용하는 것이 이상해 보일 수 있지만, 미래에 어떤 일이 일어날 지는 누구도 알 수 없다.
case errSecSuccess:
  //errSecSuccess는 password가 이제 keychain에 있음을 의미한다. 여기서 더 추가할 작업은 없다.
  break
default:
  //status에 다른 value가 포함되어 있으면, function는 실패한 것이다.
  //KeychainWrapperError에는 SecCopyErrorMessageString(_:_:)을 사용하여, human-readable한 exception 메시지를 만드는 initializer가 포함되어 있다.
  throw KeychainWrapperError(status: status, type: .servicesError)
}
이 동일한 패턴(pattern)을 사용하여, 모든 키체인(Keychain) 기능(capabilities)에 접근(access)한다. 먼저 수행할 작업을 정의(defining)하는 쿼리(query)를 만든 다음, 해당 쿼리(query)로 함수(function)를 호출(call)한다.
이제 키체인(keychain)에 비밀번호(password)를 저장(store)하는 메서드(method)가 있다. 다음으로, 방금 추가(added)한 항목(item)을 찾고(find) 가져오는(retrieve) 검색(search) 기능(functionality)을 추가(add)한다.
Searching for Keychain Items
키체인(keychain)에서 항목(item)을 읽는(read) 작업의 단계(steps)는 항목(item)을 추가(add)하는 것과 동일(mirror)하다.
KeychainWrapper클래스(class)의 끝에 다음 새 메서드(method)를 추가한다:func getGenericPasswordFor( account: String, service: String ) throws -> String { let query: [String: Any] = [ kSecClass as String: kSecClassGenericPassword, kSecAttrAccount as String: account, kSecAttrService as String: service, //keychain에 password를 추가할 때에는 kSecClass, kSecAttrAccount, kSecAttrService를 제공했다. //이제 이러한 값들을 사용하여, keychain에서 item을 찾을 수 있다. kSecMatchLimit as String: kSecMatchLimitOne, //kSecMatchLimit을 사용하여, Keychain Services에 search 결과가 단일 item임을 알려준다. kSecReturnAttributes as String: true, kSecReturnData as String: true //dictionary의 마지막 두 parameters는 Keychain Services에 발견된 value에 대한 모든 data와 attributes을 return하도록 지시한다. ] }다시 말하지만, 키체인(keychain)에서 항목(item)을 읽을(reading) 때, 첫 번째 단계(step)는 적절한(appropriate) 쿼리(query)를 만드는 것이다.
쿼리(query) 다음에 아래 코드를 추가(add)한다:
var item: CFTypeRef?
let status = SecItemCopyMatching(query as CFDictionary, &item)
guard status != errSecItemNotFound else {
  throw KeychainWrapperError(type: .itemNotFound)
}
guard status == errSecSuccess else {
  throw KeychainWrapperError(status: status, type: .servicesError)
}
먼저 키체인 서비스(Keychain Services)가 찾을 값(value)을 보유(hold)할 옵셔널(optional)
CFTypeRef변수(variable)를 정의(define)한다. 그런 다음SecItemCopyMatching(_:_:)을 호출(call)하고, 쿼리(query)와 대상 값(destination value)에 대한 포인터(pointer)를 제공(provide)한다. 이 함수(function)는 키체인(keychain)에서 일치(match)하는item을 검색(searches)하여 복사(copies)한다.Note: 이전에 본 적없는 패턴(pattern)일 수도 있다. 매개 변수(parameter) 앞의 앰퍼샌드(ampersand, "&")는 값(value) 자체가 아니라 메모리(memory) 위치(slot)에 대한 포인터(pointer)를 의미한다. C 함수(function)는 해당 위치(location)의 메모리(memory)를 새 값(value)으로 업데이트(update)한다.
다시 말하지만, 상태 코드(status code)는 오류(error) 정보(information)를 제공(provides)한다. 이 코드에는 키체인 서비스(Keychain Services)가 요청된(requested) 항목(item)을 찾지 못하는 경우의 특정 오류를 포함(contains)하고 있다.
이제 키체인(keychain) 항목(item)을 가지고 있지만,
CFTypeRef유형이다.getGenericPasswordFor(account:service:)의 끝에 다음 코드를 추가한다.guard let existingItem = item as? [String: Any], //반환된 CFTypeRef를 dictionary로 캐스팅한다. let valueData = existingItem[kSecValueData as String] as? Data, //dictionary에서 kSecValueData 값을 추출하여 Data로 캐스팅한다. let value = String(data: valueData, encoding: .utf8) //Data를 다시 String로 변환한다. //password를 저장 때 수행한 작업을 반대로 한다. else { //이러한 단계 중 하나라도 nil을 반환하면, data를 읽을 수 없다는 의미이므로 error를 발생시킨다. throw KeychainWrapperError(type: .unableToConvertToString) } return value //캐스팅 및 변환이 성공하면, 저장된 password가 포함된 String을 반환한다.이제 키체인(keychain) 항목(item)을 저장(store)하고 가져오는(retrieve) 데 필요한 모든 기능(capabilities)을 구현(implemented)했다. 다음으로, 제대로 작동하는지 확인할 수 있도록 사용자 인터페이스(user interface)를 연결(hook up)한다.
Using Keychain Services in SwiftUI
Models 그룹(group)에서 NoteData.swift를 연다. 앱(app)에서 비밀번호(password)에 접근(access)하려면, 두 가지 메서드(methods)를 사용한다.
getStoredPassword()는 비밀번호(password)를 읽고(reads),updateStoredPassword(_:)는 비밀번호(password)를 설정(sets)한다. 여기에는isPasswordBlank라는 속성(property)도 있다.먼저 클래스(class) 시작 부분에서
let passwordKey = "Password"구문(statement)을 삭제(delete)한다.이제 기존(existing)의
getStoredPassword()메서드(method)를 다음으로 바꾼다(replace):func getStoredPassword() -> String { let kcw = KeychainWrapper() if let password = try? kcw.getGenericPasswordFor( account: "RWQuickNote", service: "unlockPassword" ) { return password } return "" }이 메서드(method)는
KeychainWrapper를 생성하고,getGenericPasswordFor(account:service:)를 호출(calls)하여 비밀번호(password)를 읽고(read) 반환(return)한다.try?표현식(expression)은 예외(exception)를 nil로 변환(converts)한다. 이렇게 하면 검색(search)이 실패한(unsuccessful) 경우, 메서드(method)는 빈(empty) 문자열(string)을 반환(return)한다.다음으로
updateStoredPassword(_:)를 다음으로 바꾼다(replace):func updateStoredPassword(_ password: String) { let kcw = KeychainWrapper() do { try kcw.storeGenericPasswordFor( account: "RWQuickNote", service: "unlockPassword", password: password) } catch let error as KeychainWrapperError { print("Exception setting password: \(error.message ?? "no message")") } catch { print("An error occurred setting the password.") } }KeychainWrapper를 사용하여 동일한account와service에 비밀번호(password)를 설정(set)한다. 이 앱(app)의 경우 콘솔(console)에 오류(errors)를 출력(print)한다.이제 빌드(build)하고 실행(run)한다. 앱(app)이 실행(runs)될 때 앱(app)에서 다시 비밀번호(password)를 설정(set)하도록 요청(asks)한다. 그러나 앱(app)은 더 이상 안전(secure)하지 않은 UserDefaults에서 이를 읽어(reads)오지 않는다. 대신(instead) 암호화(encrypted)된 키체인(keychain)을 사용하여 비밀번호(password)를 저장(store)하고 가져온다(retrieve).

새 비밀번호(password)를 입력(enter)하면, 이전에 실행(run)했던 메모(note)가 표시된다. 잠금(locks) 버튼(button)을 두 번 탭(tap)한다. 이렇게 하면 방금 설정(set)한 비밀번호(password)를 사용하여 메모(note)가 잠긴(locks) 다음, 다시 잠금 해제(unlocks)된다. 비밀번호(password)가 작동하고, 메모(note)가 나타난다(appears).
이제 키체인(keychain)에 비밀번호(password)를 추가(add)하고, 이를 가져와(retrieve) 사용자(user)를 인증(authenticate)할 수 있다. 하지만 앱(app)에서 키체인 서비스(Keychain Services) 구현(implementation)을 완료(complete)하려면, 몇 가지 메서드(methods)을 더 추가(add)해야 한다.
Updating a Password in the Keychain
앱(app)이 실행(running)되고 메모(note)가 잠금 해제(unlocked)된 상태에서, 이중 화살표(double-arrow) 버튼(button)을 탭(tap)하여 비밀번호(password)를 변경(change)한다. 새 비밀번호(password)를 입력(enter)하고, Set Password을 탭(tap)한다. 콘솔(console) 창(window)에 오류(error)가 표시된다(appears):

항목(item)이 이미 있으면(exists), 키체인(keychain)에 추가할 수 없다. 대신(instead) 저장된(stored) 항목(item)을 업데이트(update)해야 한다.
KeychainServices.swift를 연다.
KeychainWrapper클래스(class)의 끝에 다음 코드를 추가한다:func updateGenericPasswordFor( account: String, service: String, password: String ) throws { guard let passwordData = password.data(using: .utf8) else { print("Error converting value to data.") return } let query: [String: Any] = [ kSecClass as String: kSecClassGenericPassword, kSecAttrAccount as String: account, kSecAttrService as String: service ] //search query는 update할 데이터를 지정한다. //이전에 만든 search query와 마찬가지로 attributes을 제공하지만, match limit 및 return attributes과 같은 search parameters를 사용하지 않았다. //따라서 이 function는 일치하는 모든 entries을 update한다. let attributes: [String: Any] = [ kSecValueData as String: passwordData ] //두 번째 dictionary에는 update할 data가 포함되어 있다. //class에 유효한 일부 또는 모든 attributes을 지정할 수 있지만, 변경하려는 속성만 포함한다. //여기에서는 새 password만 지정한다. //그러나 service나 account에 대한 새 value을 저장하려는 경우, 해당 attributes을 설정할 수도 있다. let status = SecItemUpdate(query as CFDictionary, attributes as CFDictionary) guard status != errSecItemNotFound else { throw KeychainWrapperError( message: "Matching Item Not Found", type: .itemNotFound) } guard status == errSecSuccess else { throw KeychainWrapperError(status: status, type: .servicesError) } //SecItemUpdate(_:_:)는 위의 두 dictionaries의 내용을 사용하여 update를 수행한다. //가장 일반적인 error는 The specified attribute does not exist 이다. //이 error는 Keychain Services가 search query와 일치하는 항목을 찾지 못했음을 나타낸다. }이 코드는 앞서 추가한
storeGenericPasswordFor(account:service:password:)와 유사(similar to)하다. 그러나(however) 업데이트(update)에는 검색(search) 쿼리(query)가 있는 dictionary와 원하는(desired) 변경 사항(changes)이 포함된 dictionary, 두 개의 dictionaries가 필요하다.새로운 키체인(keychain) 항목(item)을 작성(write)해야 하는지, 기존 항목(item)을 업데이트(update)해야 하는지, 잘못된 메서드(method)를 호출(call)할 때 발생하는 오류(errors)를 처리해야 하는지 계속 확인(checking)하고 결정할(deciding) 필요가 없다. 지금 이것을 고칠(fix) 것이다.
storeGenericPasswordFor(account:service:password:)에서switch status구문(statement)을 찾고, default: 위에 새로운 case를 추가한다:case errSecDuplicateItem: try updateGenericPasswordFor( account: account, service: service, password: password)errSecDuplicateItem은 기존(existing) 항목(item)을 저장(storing)할 때 반환(returned)되는 상태(status)이다. 이제 기존(existing) 항목(item)을 저장(store)하려고 하면, 대신(instead) 업데이트(updating)로 돌아가게 된다.빌드(build)하고 실행(run)한다. 이전에 설정한 비밀번호(password)를 사용하여 메모(note)를 잠금 해제(unlock)한다(위의 비밀번호(password) 변경(change)이 완료(complete)되지 않았음을 기억해야 한다. 이미 존재(existed)하는 항목(item)을 추가(add)하려했기에 예외(exception)가 발생했다). 비밀번호(password)를 다시 변경(change)하면 성공(success)한다.
이제 앱(app)에서 비밀번호(password)를 추가(add), 가져오기(retrieve), 업데이트(update)할 수 있다. 하지만 아직 한 가지 작업(action)이 누락(missing)되었다. 키체인(keychain)에서 값(value)을 삭제(delete)할 수 있어야 한다.
Deleting a Password From the Keychain
KeychainServices.swift에서
KeychainWrapper의 끝에 다음 코드를 추가한다:func deleteGenericPasswordFor( account: String, service: String ) throws { let query: [String: Any] = [ kSecClass as String: kSecClassGenericPassword, kSecAttrAccount as String: account, kSecAttrService as String: service ] //query가 add 및 update와 비슷해 보이지만, 여기에서는 새 value을 제공하지 않는다. //Note: query가 delete할 item만 식별하는지 확인한다. //여러 items이 해당 query와 일치하는 경우, Keychain Services는 모든 항목을 deletes한다. let status = SecItemDelete(query as CFDictionary) guard status == errSecSuccess || status == errSecItemNotFound else { throw KeychainWrapperError(status: status, type: .servicesError) } //query를 사용하여 SecItemDelete(_:)를 호출하여 items을 delete한다. //이 작업은 실행 취소할 수 없다. }다시 말하지만, 이 코드의 대부분은 이전에 항목(item)을 추가(add)하고 업데이트(update)하기 위해 추가한 코드와 유사(similar to)하다.
storeGenericPasswordFor(account:service:password:)상단(top)에 다음 코드를 추가하여, 새 메서드(method)를 호출(call)한다:if password.isEmpty { try deleteGenericPasswordFor( account: account, service: service) return }이제 키체인(keychain)에서 항목(items)을 추가(add), 가져오기(retrieve), 업데이트(update), 삭제(delete)할 수 있다. 이 네 가지 메서드(methods)는 키체인(keychain)에서 항목(items)을 작업하는 데 필요한 핵심(core) 기능(functionality)을 제공한다.
앱(app)을 빌드(build)하고 실행(run)하여, 재설정(reset) 버튼(button)을 탭(tap)한다. 앱(app)은 비밀번호(password)와 메모(note)를 빈(empty) 문자열(strings)로 설정(sets)한다. 방금 변경(changes)한 사항 덕분에, 재설정(reset) 버튼(button)은 이제 암호(password)와 메모(note)를 삭제(deletes)한다.
앱(app)을 다시 실행(rerun)하고 초기 비밀번호(initial password)를 설정(set)한다. 잠금(lock) 버튼(button)을 두 번 탭(tap)하여, 새 비밀번호(password)로 메모(note)를 잠금 해제(unlocks)하는지 확인(confirm)한다. 이제 화살표(arrows) 버튼(button)을 눌러(tap), 비밀번호(password)를 변경(change)한다. 다시 잠금(lock) 버튼(button)을 두 번 탭(tap)하여, 앱(app)에 새 비밀번호(password)가 저장(stored)되었는지 확인(verify)한다.
축하한다. 이제 비밀번호(password)를 보호(secure)하기 위해, 앱(app)에 키체인 서비스(Keychain Services)를 추가(added)했다.
메모(note)를 볼 때마다 비밀번호(password)를 입력(typing)하는 것은 사용자에겐 싫증나는(tedious) 작업이다. 다음으로 생체 인증(biometric authentication)을 추가(add)하여 더 간단(simpler)하지만 여전히 안전(secure)한 잠금 해제(unlocking)를 구현한다.
Biometric Authentication in SwiftUI
생체 인증(biometric authentication)은 신체의 고유한(unique) 특성(characteristics)을 사용하여 신원(identity)을 확인(verify)한다. Apple은 두 가지 생체 인증(biometric authentication) 방법(methods)을 제공(provides)한다:
- Touch ID는 지문(fingerprint)을 사용한다.
- Face ID는 얼굴(face)의 고유한(unique) 모양(shape)을 사용한다.
두 방법(methods) 모두 비밀번호(password)보다 빠르고(faster) 쉽다(easier). 그리고 더 안전(secure)하다. 누군가가 비밀번호(password)를 추측(guess)할 수도 있지만, 지문(fingerprint)이나 얼굴(face)을 복제(replicating)하는 것은 현실이 아닌 스파이(spy) 영화의 세계에 속한 영역이다.
다음 섹션(section)에서는 앱(app)에 생체 인증(biometric authentication)을 구축(build)한다.
Enabling Biometric Authentication in Your App
ToolbarView.swift를 연다. 이 뷰(view)는 편집기(editor) 위에 표시된 도구 모음(toolbar)을 정의(defines)한다. 메모(note)를 잠그거나(locks) 잠금 해제(unlocks)하는 잠금(lock) 버튼(button)을 포함(includes)하고 있다. 앱(app)에 생체 인증(biometric authentication)을 추가(add)하기에 완벽한(perfect) 장소이다. 로컬 인증(Local Authentication) 프레임 워크(framework)를 사용하여 이 작업을 수행한다.
파일(file)의 상단(top)에서, 기존 import 구문(statement) 다음에 아래 코드를 추가한다:
import LocalAuthenticationLocalAuthentication프레임 워크(framework)는 사용자(user)가 기기(device)를 잠금 해제(unlock)하는 데 필요한 시스템(예: 암호(passcode), Touch ID, Face ID)에 대한 접근(access)을 허용한다. 현재 메모(note)가 잠겨(locked) 있고 사용자(user)가 잠금(lock) 버튼(button)을 탭(taps)하면, 앱(app)은showUnlockModal상태 속성(state property)을 true로 설정(sets)한다.showUnlockModal을 true로 설정(setting)하면, 비밀번호(password)를 요청(requests)하고 유효성을 검사(validates)하는 뷰(view)가 표시(displays)된다.이를 생체 인증(biometric authentication)으로 대신하도록 변경(change)한다. 실패(fails)하거나 사용(available)할 수 없는 경우, 비밀번호(password) 뷰(view)로 돌아간다.
ToolbarView.swift에서
body위에 다음 메서드(method)를 추가(add)한다:func tryBiometricAuthentication() { let context = LAContext() var error: NSError? //LAContext 객체를 사용하여, 생체 인증에 access한다. //이는 user interaction에서 biometrics을 수집하고 device의 Secure Enclave와 통신한다. //LocalAuthentication은 Swift보다 오래되었으며, NSError와 같은 Objective-C 패턴을 사용한다. if context.canEvaluatePolicy( .deviceOwnerAuthenticationWithBiometrics, error: &error) { //먼저 authentication이 사용 가능한지 확인한다. //.deviceOwnerAuthenticationWithBiometrics는 생체 인증을 요청한다. let reason = "Authenticate to unlock your note." context.evaluatePolicy( .deviceOwnerAuthenticationWithBiometrics, localizedReason: reason) { authenticated, error in //사용자에게 인증을 사용하려는 이유를 이유를 설명한다. //evaluationPolicy(_:localizedReason:reply:)를 호출하면 인증을 요청한다. //현재 device에서 사용 가능한 Face ID 또는 Touch ID 인증을 수행한다. //이 호출은 반환될 때 block을 실행한다. DispatchQueue.main.async { //block에서는 이 코드를 실행하고 UI를 변경하므로, 변경 내용이 UI 스레드에서 실행되어야 한다. if authenticated { //인증에 성공하면, note를 잠금 해제로 설정한다. //인증에 대한 추가 정보는 없다. 오로지 성공과 실패 여부만 알 수 있다. self.noteLocked = false } else { //인증에 실패하면, block에 발생한 error를 출력한다. if let errorString = error?.localizedDescription { print("Error in biometric policy evaluation: \(errorString)") } self.showUnlockModal = true //showUnlockModal 상태를 true로 설정한다. 이렇게 하면, app이 수동 password 동작으로 돌아가게 된다. } } } } else { //초기 확인에 실패한다면, 생체 인증을 사용할 수 없다는 의미이다. if let errorString = error?.localizedDescription { print("Error in biometric policy evaluation: \(errorString)") } showUnlockModal = true //수신된 erorr를 출력한 다음, unlock view를 표시한다. 다시 말해, 대체 인증을 제공한다. //일부 device에는 인증이 없거나, user가 설정하지 않았을 수 있다. 그리고 때때로 인증이 실패할 수도 있다. //실패 이유가 무엇이든, 항상 user에게 생체 인증없이도 app을 사용할 수 있는 적절한 방법을 제공해야 한다. } }이 기능(functionality)을 사용하려면, 변경해야할 곳이 한 군데 더 있다. Command-F를 눌러
// Biometric Authentication Point주석(comment)을 찾는다. 다음 행(line)인self.showUnlockModal = true를 새 메서드(method) 호출로 바꾼다(replace):self.tryBiometricAuthentication()이제 생체 인증(biometric authentication) 기능(functionality)을 확인(test)할 준비가 되었다.
Simulating Biometric Authentication in Xcode
다행히도(fortunately) 시뮬레이터(simulator)로 테스트(testing) 중에 생체 인증(biometric authentication)을 확인(simulate)해 볼 수 있다. 선택한 시뮬레이션 기기(simulated device)에 따라, 생체 인증(biometric authentication) 유형(type)이 결정(determines)된다.
Simulating Touch ID Authentication
Touch ID를 테스트(test)하려면 iPhone SE (2nd generation)를 선택하여 빌드(build)하고 실행(run)한다. 잠금 해제(unlock) 버튼(button)을 탭(tap)하면, 일반(normal) 잠금 해제(unlock) 창(window)이 나타난다. 콘솔(console)을 확인해 보면, No identities are enrolled라는 오류(error) 메시지(message)가 표시된다.
시뮬레이터(simulator)는 생체 인증(biometric authentication)에 기기(device)를 자동(automatically)으로 등록(enroll)하지 않으므로, 직접 설정해야 한다. 시뮬레이터(simulator)에서 Features ▸ Touch ID ▸ Enrolled을 선택하십시오. 메모(note)를 잠금 해제(unlock)하려면 비밀번호(password)를 입력(enter)한다. 그런 다음 잠금(lock) 버튼(button)을 두 번 탭(tap)한다. 그러면 기기가 잠기고(lock), 다시 잠금 해제(unlock)를 시도한다. 이번에는 Touch ID 프롬프트(prompt)가 표시된다.

생체 인증(biometric authentication)을 확인(simulate)하려면, Features ▸ Touch ID 메뉴(menu)의 다른 옵션(options)을 사용한다. 인증(authentication) 성공을 실행(execute)하려면, Features ▸ Touch ID ▸ Matching Touch를 선택(select)한다. 잠시 후, 인증(authentication) 요청(request)이 사라지고 메모(note)가 잠금 해제(unlock)된다.
인증(authentication) 실패시 동작(behavior)도 확인(verify)할 수 있다. 잠금(lock) 버튼(button)을 탭(tap)하여, 메모(note)를 잠근다(lock). 다시 탭(tap)하여, 인증(authentication)을 시도(attempt)한다. 인증(authentication) 실패를 확인(simulate)하려면, Features ▸ Touch ID ▸ Non-matching Touch를 선택(select)한다. 실패 메시지(prompt)가 나타난다:

프롬프트(prompt)에서 두 옵션(option) 중 하나를 선택(selecting)하면, 인증(authentication)이 실패(fail)하고 이전 잠금 해제(unlock) 페이지(page)가 표시(present)된다. 여전히 메모(note)를 잠금 해제(unlock)할 수 있는지 확인(verify)하려면, 비밀번호(password)를 입력(enter)한다.
사용자가 대체 수단(fallback)으로 기기(device) PIN을 입력(enter)하도록 할 수도 있다. 이렇게 하려면, ToolbarView.swift를 다시 열고, Command-F를 사용하여
context.evaluatePolicy를 찾는다. 그리고.deviceOwnerAuthenticationWithBiometrics를.deviceOwnerAuthentication으로 변경(change)한다.이제 빌드(build)하고 실행(run)한다. 인증(authentication)에 실패하면, Enter Password 옵션(option)이 Enter Passcode로 변경되었는지 확인(notice)한다. 탭(tap)하면 시뮬레이터(simulator) 비밀번호(passcode) 항목(entry)이 표시된다. 시뮬레이터(simulator)의 경우, 모든 비밀번호(passcode) 값(value)이 작동한다. 비밀번호(passcode)를 입력하면, 메모(note)가 잠금 해제(unlock)된다.

Simulating Face ID Authentication
Face ID는 Touch ID처럼 작동한다. 그러나 Face Id에는 한가지 새로운 요구 사항(requirement)이 있다. NSFaceIDUsageDescription 키(key)를 앱(app)의 Info.plist에 추가해야 한다. 그렇지 않으면 승인(authorization) 요청(requests)이 실패(fail)한다.
Info.plist를 연다. 페이지(page)의 빈(empty) 부분을 우클릭(right-click)하고, Add Row를 선택(select)한다. 키(keys) 목록(list)을 스크롤(scroll)하여 Privacy – Face ID Usage Description을 선택(select)한다. 값(value) 열(column) 아래를 더블 클릭(double-click)하여, To allow you to unlock your note without entering your password를 입력한다.
이제 기기(device)를 Face ID를 지원(supports)하는 iPhone 11 Pro로 변경(change)한여 빌드(build)하고 실행(run)한다. 시뮬레이터(simulator)에서 Features ▸ Face ID ▸ Enrolled을 선택(select)한다. 새로운 생체 인증(biometric authentication) 방식(method)을 반영(reflect)하도록, 메뉴(name) 이름이 변경(changed)되었다.
시뮬레이터(simulator)의 앱(app)에서 새 비밀번호(password)를 선택한다. 메모 뷰(note view)에서 잠금(lock) 버튼(button)을 두 번 탭(tap)한다. iOS는 생체 인증(biometric authentication)을 허용하라는 메시지를 표시(prompts)한다:

OK을 탭(tap)한다. 이제 Face ID 프롬프트(prompt)가 표시된다. Features ▸ Face ID ▸ Matching Face를 선택(select)하면, 메모(note)가 잠금 해제(unlock)된다.

Making the Authentication Method Visible to the User
이제 앱(app)이 생체 인증(biometric authentication)을 지원(supports)한다는 것을 사용자(user)에게 알리기 위해, 한 작업(touch)을 더 추가한다.
ToolbarView.swift에서
import문(statements) 바로 다음에 아래 코드를 추가한다:func getBiometricType() -> String { let context = LAContext() _ = context.canEvaluatePolicy( .deviceOwnerAuthenticationWithBiometrics, error: nil) switch context.biometryType { case .faceID: return "faceid" case .touchID: // In iOS 14 and later, you can use "touchid" here return "lock" case .none: return "lock" @unknown default: return "lock" } }이 코드는
context에서biometryType속성(property)을 사용하여, 사용 가능한(available) 생체 인증(biometric authentication) 유형(type)을 결정(determine)한다. 일치(match)시킬 SF Symbol의 이름 또는 알 수 없는 경우 현재(current)의 잠금(lock) 기호(symbol)를 반환(returns)한다. iOS 14 이전에는 Touch ID 기호(symbol)가 없었다.// Lock Icon주석(comment)을 찾아,Image코드를 다음과 같이 변경(change)한다:Image(systemName: noteLocked ? getBiometricType() : "lock.open")빌드(build)하고 실행(run)한다. 이제 잠금(lock) 버튼(button)은 인증(authentication)에 Face ID를 사용한다는 것을 나타낸다(indicates).

Where to go from here?
이 튜토리얼(tutorial)에서는 키체인 서비스(Keychain Services)를 사용하는 방법과 SwiftUI 앱(app)에서 생체 인증(biometric authentication)을 구현(implement)하는 방법을 배웠다. 이제부터 앱(apps)은 매우(super) 안전(secure)하다.
원하다면, 프로젝트(project) 자료(materials)에서 최종 프로젝트(final project)를 검토(examine)할 수 있다. 이 튜토리얼(tutorial)의 상단(top) 또는 하단(bottom)에 있는 Download Materials 버튼(button)을 클릭(clicking)하여 다운로드(download)할 수 있다.
비밀번호(password)를 보호(protected)했을 수 있지만, 메모(note) 자체는 여전히 User Defaults에 일반(plain) 텍스트(text)로 저장(stored)된다. 더 많은 양의 데이터 보안(securing)에 대한 정보는 CryptoKit tutorial을 확인(check out)한다.
다른 종류(classes)의 키체인(keychain) 항목(items)을 사용하려면, 키체인 서비스(Keychain Services)에 대한 Apple의 문서(documentation)를 먼저 확인하는 것이 좋다. 다른 클래스(classes)에 대한 과정(process)은 거의 동일하며, 문서(documentation)에는 대부분의 Swift 예제(examples)가 포함(contains)되어 있다.
UIKit에서 유사한 자료(material)를 확인(perspective)하려면, How To Secure iOS User Data: The Keychain and Biometrics — Face ID or Touch ID를 읽어본다.
키체인(Keychain)에 대한 또 다른 관점(perspective)을 보려면, Keychain Services API Tutorial for Passwords in Swift를 확인해 본다.
'Raywenderlich > Articles' 카테고리의 다른 글
Monitoring for iOS with MetricKit: Getting Started (0) 2021.07.08 Getting Started With Widgets (0) 2021.02.03 Core Data with SwiftUI Tutorial: Getting Started (0) 2020.12.09 Fastlane Tutorial: Actions and Plugins (0) 2020.12.02 Alamofire Tutorial for iOS: Advanced Usage (0) 2020.11.23