-
Alamofire Tutorial: Getting StartedRaywenderlich/Articles 2020. 11. 23. 17:30
www.raywenderlich.com/35-alamofire-tutorial-getting-started
Alamofire Tutorial: Getting Started
Take your first steps into Alamofire, the de facto networking library on iOS powering thousands of apps, by using the Imagga APIs to upload and analyze user photos.
www.raywenderlich.com
Version
Swift 4, iOS 11, Xcode 9
Update note: 이 튜토리얼(tutorial)은 Ron Kliffer에 의해 Xcode 9.3, iOS 11.3, Swift 4.1, Alamofire 4.7.0으로 업데이트(updated)되었다. 원본(original) 튜토리얼(tutorial)은 Aaron Douglas가 작성했다.
Alamofire는 Swift 기반의 iOS 및 macOS 용 HTTP 네트워킹 라이브러리(library)이다. Apple의 Foundation 네트워킹(networking) 스택(stack) 위에서 여러 일반적인(common) 네트워킹 작업을 단순화(simplifies)하는 우아한(elegant) 인터페이스(interface)를 제공(provides)한다.
Alamofire는 연결 가능한(chainable) 요청(request)/응답(response) 메서드(method), JSON 매개 변수(parameter), 응답(response) 직렬화(serialization), 인증(authentication) 및 기타 여러 기능(features)을 제공(provides)한다.
이 Alamofire 튜토리얼(tutorial)에서는 Alamofire를 사용하여 서드파티(third-party) RESTful API에서 파일 업로드(uploading files)와 데이터 요청(requesting)과 같은 기본 네트워킹(networking) 작업을 수행(perform)한다.
Alamofire의 우아한(elegance) 점은 처음부터(from the ground up) Swift로 작성되었으며, Objective-C를 사용한 AFNetworking에서 아무것도 물려 받지(inherit) 않는다는 사실이다.
HTTP 네트워킹(networking)에 대한 개념적(conceptual) 이해(understanding)와
URLSession과 같은 Apple의 네트워킹(networking) 클래스(classes)에 대한 경험(exposure)이 있어야 한다.Alamofire는 일부 세부(details) 구현 정보(implementation)를 숨기지만(obscure), 네트워크(network) 요청(requests) 문제를 해결(troubleshoot)해야 하는 경우 배경 지식(background knowledge)을 알고 있는 것이 좋다.
Getting Started
이 튜토리얼(tutorial)의 상단(top) 또는 하단(bottom)에 있는 Download Materials 버튼(button)을 사용하여 시작(starter) 프로젝트(project)를 다운로드(download)한다.
Note: Alamofire는 일반적으로 CocoaPods를 사용하여 통합(integrated)된다. 다운로드(downloaded)한 프로젝트(projects)에는 이미 설치(installed)되어 있다.
이 Alamofire 튜토리얼(tutorial)의 앱(app) 이름은 PhotoTagger이다. 완성(complete)되면 라이브러리(library, 또는 실제 기기에서 실행중인 경우 카메라)에서 이미지를 선택하고, 이미지를 Imagga라는 서드파티(third-party) 서비스(service)에 업로드(upload)할 수 있다. 이 서비스(upload)는 몇 가지 이미지 인식(recognition) 작업을 수행하여, 이미지의 태그(tags) 및 기본 색상(primary colors) 목록(list)을 제공(service)한다:

이 프로젝트(project)는 CocoaPods를 사용하므로, PhotoTagger.xcworkspace 파일을 사용하여 연다.
Note: CocoaPods에 대해 자세히 알아 보려면 사이트에 게시(published)된 Joshua Greene의 튜토리얼(tutorial)을 확인(check)한다.
프로젝트(project)를 빌드(build)하고 실행(run)한다. 다음을 확인할 수 있다:
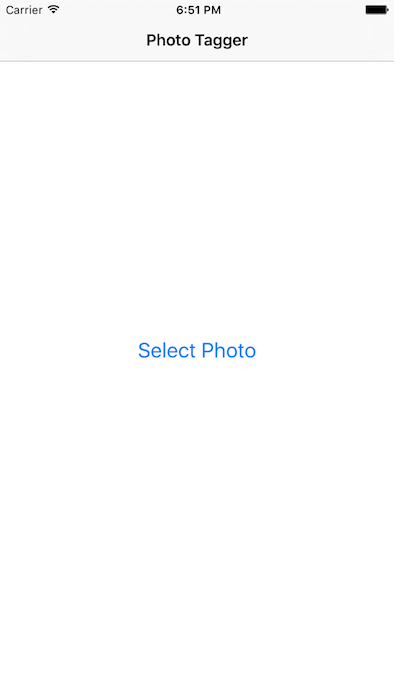
Select Photo를 클릭(click)하고 사진(photo)을 선택(choose)한다. 배경 이미지(background image)가 선택한 이미지(image you chose)로 대체된다(replaced).
Main.storyboard를 열면 태그(tags)와 색상(colors)을 표시하기 위한 추가 화면(additional screens)이 있는 것을 볼 수 있다. 남은 것(remains)은 이미지를 업로드(upload)하고 태그(tags)와 색상(colors)을 가져 오는(fetch) 것이다.
The Imagga API
Imagga는 이미지 인식(recognition) 플랫폼(Platform-as-a-Service)으로, 개발자(developers)와 기업(businesses)이 확장 가능(scalable)하고 이미지 집약적(image-intensive)인 클라우드(cloud) 앱(apps)을 구축(build)할 수 있도록 이미지 태깅(tagging) API를 제공(provides)한다. 여기에서 자동 태그(auto-tagging) 서비스(service)의 데모(demo)를 볼 수 있다.
이 Alamofire 튜토리얼(tutorial)을 진행하려면 Imagga에서 무료 개발자 계정(free developer account)을 만들어야 한다. Imagga는 각 HTTP 요청(request)에 인증(authorization) 헤더(header)가 필요하므로, 계정(account)이 있는 사람만 서비스(services)를 사용할 수 있다. https://imagga.com/auth/signup/hacker로 이동하여 양식(form)을 작성한다. 계정(account)을 생성한 후 대시 보드(dashboard)를 확인한다:

Authorization 섹션(section)에 나열된 것은 나중에 사용할 비밀 토큰(secret token)이다. 이 정보(information)를 모든 HTTP 요청(request)에 헤더(header)로 포함(include)해야 한다.
Note: 전체 비밀 토큰(whole secret token)을 복사(copy)하고, 오른쪽으로 스크롤(scroll over)하여 모두 복사(copied)했는지 확인(verify)한다.
Imagga의 content 엔드 포인트(endpoint)을 사용하여 사진을 업로드(upload)하고, 이미지 인식(recognition)을 위한 tagging 엔드 포인트(endpoint)와 색상(color) 식별(identification)을 위한 color 엔드 포인트(endpoint)를 사용한다. http://docs.imagga.com에서 Imagga API에 대한 모든 내용을 확인(read)할 수 있다.
REST, HTTP, JSON — What’s that?
인터넷(Internet)으로 서드 파티(third-party) 서비스(services)를 사용한 경험(experience)이 거의 없이 이 튜토리얼(tutorial)을 시작한다면, 이 모든 약어(acronyms)가 무엇을 의미하는지 궁금할 것이다.
HTTP는 웹 사이트(web sites)가 웹 서버(web server)에서 화면(screen)으로 데이터를 전송(transfer)하는 데 사용하는 응용 프로그램(application) 프로토콜(protocol) 또는 규칙 집합(set of rules)이다. 웹 브라우저(web browser)에 입력(type into)하는 모든 URL 앞(front)에 HTTP(또는 HTTPS)가 나열(listed in)되어 있다. FTP, Telnet, SSH와 같은 다른 응용 프로그램 프로토콜(application protocols)에 대해 들어봤을 것이다. HTTP는 클라이언트(client, 웹 브라우저 또는 앱)가 원하는 작업을 나타내는 데 사용하는 여러(several) 요청(request) 메서드(methods) 또는 동사(verbs)를 정의(defines)한다:
- GET: 웹 페이지(web page)와 같은 데이터를 검색(retrieves)하지만, 서버(server)의 데이터는 변경(alter)하지 않는다.
- HEAD: GET과 동일(Identical)하지만, 헤더(headers)만 반환(sends back)하고 실제 데이터는 보내지 않는다.
- POST: 일반적으로 양식(form)을 작성(filling)하고 제출(submit)할 때 사용되며, 데이터를 서버(server)로 보낸다.
- PUT: 제공된 특정 위치(specific location provided)로 데이터를 보낸다(sends).
- DELETE: 제공된 특정 위치(specific location provided)에서 데이터를 삭제(deletes)한다.
REST(REpresentational State Transfer)는 일관(consistent)되고 사용하기 쉬우며(easy-to-use) 유지 보수가 가능한(maintainable) 웹(web) API를 설계(designing)하기 위한 일련의 규칙(set of rules)이다. REST에는 요청(requests)간에 상태(states)를 유지(persisting)하지 않도록 하거나, 요청(requests)을 캐시할 수 있게(cacheable) 만들거나, 균일한(uniform) 인터페이스(interfaces)를 제공(providing)하는 등의 여러(several) 아키텍처(architecture) 규칙(rules)이 있다. 따라서 앱 개발자(app developers)는 여러 요청(requests)에서 데이터 상태(state)를 추적(track)할 필요없이, API를 앱(app)에 쉽게 통합(integrate)할 수 있다.
JSON은 JavaScript Object Notation을 나타내며, 두 시스템(systems)간에 데이터를 전송(transporting)하기 위한 간단하고(straightforward) 사람이 읽을 수 있는(human-readable) 이식 가능한(portable) 메커니즘(mechanism)을 제공(provides)한다. JSON은string, boolean, array, object/dictionary, null, number로 데이터 유형(types)이 제한(limited)되어 있다. 정수(integers)와 소수(decimals) 사이에는 구분(distinction)이 없다.
메모리(memory)의 객체(objects)를 JSON으로, 또는 그 반대로(vice-versa) 변환(converting)하기 위한 몇 가지 기본(native) 선택 사항(choices)이 있다. 예전의
JSONSerialization클래스(class)와 새로 추가된(newly-added)JSONEncoder,JSONDecoder클래스(classes)이다. 또한(in addition), JSON을 처리(handling)하는 데 도움이 되는 수 많은(numerous) 서드 파티(third party) 라이브러리(libraries)가 있다. 이 튜토리얼(tutorial)에서는 그 중 하나인SwiftyJSON을 사용한다.HTTP, REST, JSON의 조합(combination)은 개발자(developer)가 사용할 수 있는 웹 서비스(web services)의 상당 부분(portion)을 구성한다(make up). 모든 작은 조각(little piece)이 어떻게 작동하는지 이해하려고 노력하는 것은 너무 과도할(overwhelming) 수 있다. Alamofire와 같은 라이브러리(libraries)는 이러한 서비스(services) 작업의 복잡성(complexity)을 줄이고(reduce), 더 빠르게(faster) 시작하고 실행할 수 있다.
What is Alamofire Good For?
Apple은 이미 HTTP를 사용해 콘텐츠(content)를 다운로드(downloading)할 수 있는
URLSession과 기타 클래스(classes)를 제공하고 있는데, 왜 Alamofire와 같은 서드 파티(third party) 라이브러리(library)를 사용해 작업을 복잡하게 만드는지 이유가 궁금할 것이다.단답(short answer)으로 말하면, Alamofire는
URLSession을 기반으로(based on) 하면서 네트워킹(networking) 코드를 훨씬 쉽게 작성할 수 있는 상용구(boilerplate) 코드를 직접 작성하지 않아도 사용할 수 있다는 것이다. 아주 적은 노력(effort)으로 인터넷의 데이터에 접근(access)할 수 있으며 코드가 훨씬 깨끗(cleaner)하고 읽기 쉬워진다(easier to read).Alamofire에서 사용할 수 있는 몇 가지(several) 주요(major) 함수(functions)는 다음과 같다:
Alamofire.upload: 멀티 파트(multipart), 스트림(stream), 파일(file), 데이터(data) 메서드(methods)로 파일을 업로드(upload)한다.Alamofire.download: 파일을 다운로드(download)하거나 이미 진행(progress) 중인 다운로드를 재개(resume)한다.Alamofire.request: 파일 전송(transfers)과 관련(associated with)이 없는 다른 모든 HTTP 요청(request)이다.
이러한 Alamofire 메서드(methods)는 Alamofire 내에서 전역(global)이기 때문에, 사용하기 위해 클래스(class)를 인스턴스화(instantiate)할 필요가 없다.
SessionManager,DataRequest,DataResponse와 같은 클래스(classes) 및 구조체(structs)는 Alamofire의 기본 부분(underlying pieces)이지만, 이를 사용하기 위해 Alamofire의 전체(entire) 구조(structure)를 완전히 이해할 필요는 없다.다음은 Apple의
URLSession및 Alamofire의request함수(function)를 사용하는 동일한 네트워킹(networking) 작업(operation)의 예시(example)이다:// With URLSession public func fetchAllRooms(completion: @escaping ([RemoteRoom]?) -> Void) { guard let url = URL(string: "http://localhost:5984/rooms/_all_docs?include_docs=true") else { completion(nil) return } var urlRequest = URLRequest(url: url, cachePolicy: .reloadIgnoringLocalAndRemoteCacheData, timeoutInterval: 10.0 * 1000) urlRequest.httpMethod = "GET" urlRequest.addValue("application/json", forHTTPHeaderField: "Accept") let task = urlSession.dataTask(with: urlRequest) { (data, response, error) -> Void in guard error == nil else { print("Error while fetching remote rooms: \(String(describing: error)") completion(nil) return } guard let data = data, let json = try? JSONSerialization.jsonObject(with: data) as? [String: Any] else { print("Nil data received from fetchAllRooms service") completion(nil) return } guard let rows = json?["rows"] as? [[String: Any]] else { print("Malformed data received from fetchAllRooms service") completion(nil) return } let rooms = rows.flatMap { roomDict in return RemoteRoom(jsonData: roomDict) } completion(rooms) } task.resume() }반면:
// With Alamofire
func fetchAllRooms(completion: @escaping ([RemoteRoom]?) -> Void) {
  guard let url = URL(string: "http://localhost:5984/rooms/_all_docs?include_docs=true") else {
    completion(nil)
    return
  }
  Alamofire.request(url,
                    method: .get,
                    parameters: ["include_docs": "true"])
  .validate()
  .responseJSON { response in
    guard response.result.isSuccess else {
      print("Error while fetching remote rooms: \(String(describing: response.result.error)")
      completion(nil)
      return
    }

    guard let value = response.result.value as? [String: Any],
      let rows = value["rows"] as? [[String: Any]] else {
        print("Malformed data received from fetchAllRooms service")
        completion(nil)
        return
    }

    let rooms = rows.flatMap { roomDict in return RemoteRoom(jsonData: roomDict) }
    completion(rooms)
  }
}
Alamofire가 필요한(required) 설정(setup)이 더 짧고(shorter), 함수(function)가 수행하는 작업이 훨씬 더 명확(clearer)하다는 것을 알 수 있다.
responseJSON(options:completionHandler:)로 응답(response)을 역직렬화(deserialize)하고validate()를 호출(calling)하여 응답 상태 코드(response status code)가 200에서 299 사이의 기본 허용 범위(default acceptable range)에 있는지 확인하면 오류 조건 처리(error condition handling)가 단순해(simplifies)진다.이론(theory)은 끝났다. 이제 Alamofire를 직접 사용할 때이다.
Uploading Files
ViewController.swift를 열고,
import SwiftyJSON아래에 다음을 추가한다:import Alamofire이렇게 하면 곧 수행할 코드에서 Alamofire 모듈(module)이 제공하는 기능(functionality)을 사용할 수 있다.
다음으로,
imagePickerController(_:didFinishPickingMediaWithInfo:)로 이동하여 끝의dismiss(animated:)호출(call) 직전에 다음을 추가한다:takePictureButton.isHidden = true progressView.progress = 0.0 progressView.isHidden = false activityIndicatorView.startAnimating() //upload 버튼을 숨기고, progress view와 activity view를 표시한다. upload(image: image, progressCompletion: { [weak self] percent in self?.progressView.setProgress(percent, animated: true) //upload되는 동안, progress handler를 업데이트된 백분율로 호출한다. //이는 progress bar의 progress indicator를 업데이트한다. }, completion: { [weak self] tags, colors in self?.takePictureButton.isHidden = false self?.progressView.isHidden = true self?.activityIndicatorView.stopAnimating() self?.tags = tags self?.colors = colors //upload가 완료되면, completion handler가 실행되어 controls를 원래 state로 되돌린다. self?.performSegue(withIdentifier: "ShowResults", sender: self) //마지막으로 스토리보드는 upload가 완료되거나, 성공적으로 완료되지 않을 때 결과 화면으로 이동한다. //user interface는 오류 조건에 따라 변경되지 않는다. })Alamofire의 모든 것은 비동기(asynchronous)이므로, UI도 비동기(asynchronous)로 업데이트(update)한다.
다음으로 파일 하단에서
upload(image:progressCompletion:completion:)을 찾는다. 현재는 메소드(method) 조각(stub)일 뿐이므로, 다음과 같이 구현(implementation)한다:func upload(image: UIImage, progressCompletion: @escaping (_ percent: Float) -> Void, completion: @escaping (_ tags: [String]?, _ colors: [PhotoColor]?) -> Void) { guard let imageData = UIImageJPEGRepresentation(image, 0.5) else { //upload 중인 image를 Data 인스턴스로 변환한다. print("Could not get JPEG representation of UIImage") return } Alamofire.upload(multipartFormData: { multipartFormData in //Imagga의 content endpoint로 보내기 위해, JPEG data blob(imageData)을 MIME multipart request로 변환한다. multipartFormData.append(imageData, withName: "imagefile", fileName: "image.jpg", mimeType: "image/jpeg") }, to: "http://api.imagga.com/v1/content", headers: ["Authorization": "Basic xxx"], encodingCompletion: { encodingResult in }) }Note: Basic xxx를 Imagga 대시 보드(dashboard)에서 가져온 실제 authorization 헤더(header)로 바꿔야(replace)한다.
다음으로
encodingCompletion클로저(closure)에 아래의 내용을 추가한다:switch encodingResult { case .success(let upload, _, _): upload.uploadProgress { progress in progressCompletion(Float(progress.fractionCompleted)) } upload.validate() upload.responseJSON { response in } case .failure(let encodingError): print(encodingError) }이 코드 덩어리(chunk)는 Alamofire의
upload함수(function)를 호출(calls)하고 작은 계산(calculation)을 전달(passes)하여 파일이 업로드(uploads)될 때 진행률 바(progress bar)를 업데이트(update)한다. 그런 다음 응답(response)의 상태 코드(status code)가 200에서 299 사이의 기본 허용 범위(default acceptable range)에 있는지 검증(validates)한다.Note: Alamofire 4 이전에는 진행 콜백(progress callbacks)이 기본 대기열(main queue)에서 호출(called)된다는 보장(guaranteed)이 없었다. Alamofire 4 부터는 새로운 진행 콜백(progress callback) API가 항상 기본 대기열(main queue)에서 호출(called)된다.
다음으로
upload.responseJSON클로저(closure)에 다음 코드를 추가한다:guard response.result.isSuccess, let value = response.result.value else { print("Error while uploading file: \(String(describing: response.result.error))") completion(nil, nil) return } //upload가 성공적으로 완료되었는지, result에 value가 있는지 확인한다. //그렇지 않은 경우에는 error를 출력하고 completion handler를 호출한다. let firstFileID = JSON(value)["uploaded"][0]["id"].stringValue //SwiftyJSON을 사용하여, response에서 firstFileID를 검색한다. print("Content uploaded with ID: \(firstFileID)") completion(nil, nil) //completion handler를 호출하여 UI를 update한다. //이 시점에서는 다운로드한 tags나 colors이 없으므로 데이터없이 간단하게 호출하면 된다.Note: 모든 응답(response)에는 값(value)과 유형(type)이 있는
Result열거형(enum)이 있다. 자동(automatic) 유효성 검사(validation)를 사용하면, 200에서 299 사이의 유효한(valid) HTTP 코드(cpde)를 반환(returns)하고 Content Type이 Accept HTTP 헤더(header) 필드(field)에 지정(specified)된 유효한(valid) 유형(type)인 경우, 결과(result)가 성공(success)한 것으로 간주(considered)된다.
아래와 같이.validate옵션(options)을 추가하여, 수동(manual) 유효성 검사(validation)를 수행(perform)할 수도 있다:Alamofire.request("https://httpbin.org/get", parameters: ["foo": "bar"]) .validate(statusCode: 200..<300) .validate(contentType: ["application/json"]) .response { response in //response handling code }업로드(upload) 중에 오류(error)가 발생해도 UI에 오류(error)를 직접 표시하지 않고, 사용자(user)에게 태그(tags)나 색상(colors)을 반환(returns)하지 않는다. 이것이 최고의 사용자 경험(user experience)은 아니지만, 이 튜토리얼(tutorial)에서는 충분(fine)하다.
프로젝트(project)를 빌드(build)하고 실행(run)한다. 이미지를 선택(select)하고 파일(file)이 업로드(uploads) 될때 진행률 바(progress bar)가 변경(change)되는 것을 확인한다. 업로드(upload)가 완료(completes)되면, 콘솔(console)에 다음과 같은 메모(note)가 표시된다:

Interwebs으로 파일(file)을 성공적으로 업로드(uploaded)했다.

Retrieving Data
이미지를 Imagga에 업로드(uploading)한 후 다음 단계(step)는 Imagga가 사진을 분석(analyzes)한 후 생성(produces)하는 태그(tags)를 가져 오는(fetch) 것이다.
upload(image:progress:completion:)아래의ViewController확장(extension)에 다음 메서드(method)를 추가한다:func downloadTags(contentID: String, completion: @escaping ([String]?) -> Void) { Alamofire.request("http://api.imagga.com/v1/tagging", parameters: ["content": contentID], headers: ["Authorization": "Basic xxx"]) //upload 후 받은 id를 URL parameters 콘텐츠로 하여 tagging 엔드포인트에 대해 HTTP GET request를 수행한다. //Basic xxx를 실제 authorization header로 바꾼다. .responseJSON { response in guard response.result.isSuccess, let value = response.result.value else { //response가 success 인지, result에 value가 있는지 확인한다. //그렇지 않은 경우에는 error를 출력한 후 completion handler를 호출한다. print("Error while fetching tags: \(String(describing: response.result.error))") completion(nil) return } let tags = JSON(value)["results"][0]["tags"].array?.map { json in //SwiftyJSON을 사용하여 response에서 tags 배열을 검색한다. json["tag"].stringValue //tags 배열의 각 dictionary 객체에 대해 반복하여 tag key와 value를 검색한다. } completion(tags) //서비스로부터 받은 tags를 전달하는 completion handler를 호출한다. } }다음으로
upload(image:progress:completion:)로 돌아가서 성공(success) 조건(condition)의 완료 처리기(completion handler) 호출(call)을 다음으로 바꾼다(replace):self.downloadTags(contentID: firstFileID) { tags in completion(tags, nil) }이는 단순히 tags를 완료 처리기(completion handler)로 보낸다.
프로젝트(project)를 빌드(build)하고 실행(run)한다. 사진을 선택(select)하면 다음과 유사한(similar to) 내용이 나타난다:

잘 작동한다(slick). Imagga는 하나의 스마트(smart) API이다. 다음으로 이미지의 색상(colors)을 가져온다(fetch).
downloadTags(contentID:completion:)아래의ViewController확장(extension)에 다음 메서드(method)를 추가한다:func downloadColors(contentID: String, completion: @escaping ([PhotoColor]?) -> Void) { Alamofire.request("http://api.imagga.com/v1/colors", parameters: ["content": contentID], headers: ["Authorization": "Basic xxx"]) //upload 후 받은 id를 URL parameters 콘텐츠로 하여 colors 엔드포인트에 대해 HTTP GET request를 수행한다. //Basic xxx를 실제 authorization header로 바꾼다. .responseJSON { response in guard response.result.isSuccess, let value = response.result.value else { //response가 success 인지, result에 value가 있는지 확인한다. //그렇지 않은 경우에는 error를 출력한 후 completion handler를 호출한다. print("Error while fetching tags: \(String(describing: response.result.error))") completion(nil) return } let photoColors = JSON(value)["results"][0]["info"]["image_colors"].array?.map { json in //SwiftyJSON을 사용하여 response에서 image_colors 배열을 검색한다. PhotoColor(red: json["r"].intValue, green: json["g"].intValue, blue: json["b"].intValue, colorName: json["closest_palette_color"].stringValue) //image_colors 배열의 각 dictionary 객체에 대해 반복하여 PhotoColor 객체로 변환한다. //이 객체는 RGB 형식의 color와 문자열의 name을 가지고 있다. } completion(photoColors) //서비스로부터 받은 photoColors를 전달하는 completion handler를 호출한다. } }마지막으로
upload(image:progress:completion:)로 돌아가 성공(success) 조건(condition)의downloadTags(contentID:)호출(call)을 다음으로 바꾼다(replace):self.downloadTags(contentID: firstFileID) { tags in self.downloadColors(contentID: firstFileID) { colors in completion(tags, colors) } }이것은 이미지 업로드(uploading the image), 태그 다운로드(downloading tags), 색상 다운로드(downloading colors) 작업(operations)을 중첩(nests)한다.
프로젝트(project)를 다시 빌드(build)하고 실행(run)한다. Colors 버튼(button)을 선택(select)하면 반환된(returned) 색상 태그(color tags)를 확인할 수 있다:

이것은
PhotoColor구조체(structs)에 매핑한(mapped) RGB 색상(colors)을 사용하여 뷰(view)의 배경색(background color)을 변경(change)한다. 이제 이미지를 Imagga에 성공적으로(successfully) 업로드(uploaded)하고, 두 개의 다른 엔드 포인트(endpoints)에서 데이터를 가져왔다(fetched). 먼 길을 왔지만, PhotoTagger에서 Alamofire를 사용하는 방법을 개선할 여지(there's some room for improvement)가 아직 남아 있다.Improving PhotoTagger
PhotoTagger에서 반복되는(repeated) 코드를 발견(noticed)했을 것이다. Imagga가 해당 API의 v2를 출시(released)하고, v1을 더 이상 사용하지 않는다면(deprecated), PhotoTagger는 더 이상 작동(function)하지 않으며 세 가지 메서드(methods) 각각에서 URL을 업데이트(update)해야 한다. 마찬가지로(similarly), 인증(authorization) 토큰(token)이 변경(changed)되면, 모든 곳에서 해당 토큰을 업데이트(updating)해야 한다.
Alamofire는 이러한 코드 중복(duplication)을 제거(eliminate)하고, 중앙 집중식 구성(centralized configuration)을 제공(provide)하는 간단한 방법(method)을 제공(provides)한다. 이 기술(technique)에는
URLRequestConvertible을 준수(conforming)하는 구조체(struct)를 만들고, 업로드(upload) 및 요청(request) 호출(calls)을 업데이트(updating)하는 것이 포함된다.File\New\File...을 클릭(clicking)하고 iOS에서 Swift 파일(file)을 선택(selecting)하여 새 Swift 파일(file)을 작성한다. Next를 클릭(click)하여 파일 이름을 ImaggaRouter.swift로 지정하고 노란색 폴더(folder) 아이콘(icon)이 있는 PhotoTagger 그룹(Group)을 선택(select)한 다음 Create를 클릭(click)한다.
새 파일(file)에 다음을 추가한다:
import Alamofire

public enum ImaggaRouter: URLRequestConvertible {
  enum Constants { //상수
    static let baseURLPath = "http://api.imagga.com/v1" //기본 URL
    static let authenticationToken = "Basic xxx" //실제 authorization header
  }

  case content
  case tags(String)
  case colors(String)
  //열거형 case를 선언한다. 각각의 case는 api endpoint에 해당한다.

  var method: HTTPMethod { //각 api endpoint에 대한 HTTP method를 반환한다.
    switch self {
    case .content:
      return .post
    case .tags, .colors:
      return .get
    }
  }

  var path: String { //각 api endpoint의 경로를 반환한다.
    switch self {
    case .content:
      return "/content"
    case .tags:
      return "/tagging"
    case .colors:
      return "/colors"
    }
  }

  var parameters: [String: Any] { //각 api endpoint의 매개변수를 반환한다.
    switch self {
    case .tags(let contentID):
      return ["content": contentID]
    case .colors(let contentID):
      return ["content": contentID, "extract_object_colors": 0]
    default:
      return [:]
    }
  }

  public func asURLRequest() throws -> URLRequest {
    //위의 모든 components를 사용하여 요청된 endpoint에 대한 URLRequest를 생성한다.
    let url = try Constants.baseURLPath.asURL()

    var request = URLRequest(url: url.appendingPathComponent(path))
    request.httpMethod = method.rawValue
    request.setValue(Constants.authenticationToken, forHTTPHeaderField: "Authorization")
    request.timeoutInterval = TimeInterval(10 * 1000)

    return try URLEncoding.default.encode(request, with: parameters)
  }
}
이제 업데이트(update)해야 할 모든 상용구(boilerplate) 코드가 한 곳에 위치하게 된다.
ViewController.swift로 돌아가서
upload(image:progress:completion:)에서:Alamofire.upload(multipartFormData: { multipartFormData in multipartFormData.append(imageData, withName: "imagefile", fileName: "image.jpg", mimeType: "image/jpeg") }, to: "http://api.imagga.com/v1/content", headers: ["Authorization": "Basic xxx"],를 다음으로 바꾼다:
Alamofire.upload(multipartFormData: { multipartFormData in
  multipartFormData.append(imageData,
                           withName: "imagefile",
                           fileName: "image.jpg",
                           mimeType: "image/jpeg")
},
    with: ImaggaRouter.content,
다음으로
downloadTags(contentID:completion:)에서Alamofire.request에 대한 호출(call)을 다음으로 바꾼다(replace):Alamofire.request(ImaggaRouter.tags(contentID))마지막으로
downloadColors(contentID:completion:)에서Alamofire.request에 대한 호출(call)을 다음과 같이 업데이트(update)한다:Alamofire.request(ImaggaRouter.colors(contentID))Note: 이전의 두 변경 모두에 대한
responseJSON처리기(handlers)는 그대로 둔다.마지막으로 빌드(build)하고 실행(run)한다. 모든 것이 이전과 동일하게 작동(function)해야 한다. 즉, 앱(app)을 망치지(breaking) 않고 모든 것을 리팩토링(refactored)했다. 그러나 Imagga에서 API, 인증 토큰(authorization token), 매개 변수(parameters) 등이 변경되더라도, 전체(entire) 소스 코드를 검토할 필요가 없다. 훌륭하다.
Where To Go From Here?
이 튜토리얼(tutorial)의 상단(top) 또는 하단(bottom)에 있는 Download Materials 버튼(button)을 사용하여 프로젝트(project)의 완성(completed)된 버전(version)을 다운로드(download)할 수 있다. 인증(authorization) 토큰(token)을 적절하게(appropriate) 교체(replace)하는 것을 잊지 마라.
이 튜토리얼(tutorial)은 기본적인(basics) 내용을 다뤘다. Alamofire 사이트의 문서(documentation)를 살펴보면 더 자세히(deeper) 알아볼 수 있다. https://github.com/Alamofire/Alamofire
또한, Alamofire 내부(under the hood)에서 사용하는 Apple의
URLSession에 대해 자세히 알아볼 수도 있다:- Apple WWDC 2015 - 711 - Networking with NSURLSession
- Apple URL Session Programming Guide
- Ray Wenderlich - NSURLSession Tutorial
아래 포럼(forum)의 토론(discussion)에서 이 튜토리얼(tutorial)에 대한 의견(comments)이나 질문(questions)을 공유(share)할 수 있다.
'Raywenderlich > Articles' 카테고리의 다른 글
Fastlane Tutorial: Actions and Plugins (0) 2020.12.02 Alamofire Tutorial for iOS: Advanced Usage (0) 2020.11.23 Alamofire 5 Tutorial for iOS: Getting Started (0) 2020.11.23 Fastlane Tutorial: Getting Started (0) 2020.11.02 SnapKit for iOS: Constraints in a Snap (0) 2020.09.10