-
Chapter 3: AsyncSequence & Intermediate TaskRaywenderlich/Modern Concurrency in Swift 2023. 1. 2. 17:40
Version
Swift 5.5, iOS 15, Xcode 13
이 책 전체에서(throughout) 비동기(asynchronous) 프로그래밍(programming)과 관련한 개발을 더 쉽게 하기 위해 비동기(async) 시퀀스(sequences)를 사용할 것이다. 비동기(async) 시퀀스(sequences)를 사용하면, Swift 시퀀스(sequence)를 반복(iterating over)하는 것처럼 간단하게(as simple as) 비동기(asynchronous) 결과(results)를 사용할 수 있다.
1장(chapter), "Why Modern Swift Concurrency?"에서 이미(already) 비동기(async) 시퀀스(sequences)를 간략하게(briefly) 시도했지만(tried), 여기서 더 자세히(deep dive into) 살펴본다.
이전(last) 장(chapter)의 SuperStorage 앱(app)을 계속(continuing) 수행하므로 해당 프로젝트(project)에 대한 소개(introduction)가 필요하지 않고 바로 시작할 수 있다(jump right in). 이 장(chapter)의 작업(working)을 마치면(finished), SuperStorage은 강력한(superpowers) 병렬 다운로드(parallel download)를 제공하게 된다.

Getting to know AsyncSequence
AsyncSequence는 요소(elements)를 비동기적으로(asynchronously) 생성(produce)할 수 있는 시퀀스(sequence)를 설명(describing)하는 프로토콜(protocol)이다. 이것의 표면(surface) API는 Swift 표준 라이브러리(standard library)의
Sequence와 동일(identical to)하지만 한 가지 차이점(difference)이 있다: 일반(regular)Sequence에서와 같이 즉시(immediately) 사용할(available) 수 없을 수 있으므로 다음(next) 요소(element)를await해야 한다.다음은 비동기(asynchronous) 시퀀스(sequence)를 사용하는 몇 가지 일반적인(common) 작업(tasks)이다:
AsyncSequence가 오류를 발생(throwing)할 수 있는 경우,try와await를 사용하여for반복문(loop)의 시퀀스(sequence)를 반복(iterating over)한다. 코드(code)는 다음(next) 값(value)을 얻기 위해, 각 반복에서(at each loop iteration) 일시 중단(suspends)된다:
for try await item in asyncSequence { // Next item from `asyncSequence` }while반복문(loop)가 있는 표준 라이브러리(standard library) 반복자(iterator)의 비동기적(asynchronous) 대안(alternative)으로 사용한다. 이는 동기(synchronous) 시퀀스(sequence)를 사용하는 것과 유사(similar to)하다: 반복자(iterator)를 만들고 시퀀스(sequence)가 끝날(over) 때까지(until),await를 사용하여 반복적으로(repeatedly)next()를 호출(call)해야 한다:
var iterator = asyncSequence.makeAsyncIterator() while let item = try await iterator.next() { ... }dropFirst(_:),prefix(_:),filter(_:)와 같은 표준(standard) 시퀀스(sequence) 메서드(methods)에 사용한다:
for await item in asyncSequence .dropFirst(5) .prefix(10) .filter { $0 > 10 } .map { "Item: \($0)" } { ... }- 파일(file) 내용(contents) 또는 서버(server) URL에서 가져올(fetching) 때와 같이, 특수(special) 원시 바이트(raw-byte) 시퀀스(sequence) 래퍼(wrappers)에 사용한다:
let bytes = URL(fileURLWithPath: "myFile.txt").resourceBytes for await character in bytes.characters { ... } for await line in bytes.lines { ... }- 자체 유형(types)에서
AsyncSequence를 채택(adopting)하여 사용자 정의(custom) 시퀀스(sequences)를 생성한다. - 마지막으로(finally),
AsyncStream을 활용(leveraging)하여 고유한(own) 사용자 정의(custom) 비동기(async) 시퀀스(sequences)를 만들 수 있다. 다음(next) 장(chapter)에서 이 선택사항(option)에 대한 모든 것을 배우게(learn) 될 것이다.
Apple이 제공(provided)하는 모든 비동기(asynchronous) 시퀀스(sequences) 유형(types)에 대한 개요(overview)는
AsyncSequence의 online documentation를 참조하면 된다. Conforming Types 아래(under)에 사용 가능한(available) 유형(types)이 나열(listed)되어 있다.Getting started with AsyncSequence
지금까지(so far), SuperStorage 앱(app)에서 파일 목록을 표시(displays)하는 메인 화면(main screen) 구축(building)을 포함(including)한 여러 작업들을 훌륭하게 수행(done)했다. 사용자(user)가 파일(file)을 선택(selects)하면, 각(each) 클라우드 서비스(cloud service)의 구독(subscription) 요금제(plans)별로 세 가지 다운로드(download) 선택사항(options)과 함께 세부 정보(details)가 표시된다:
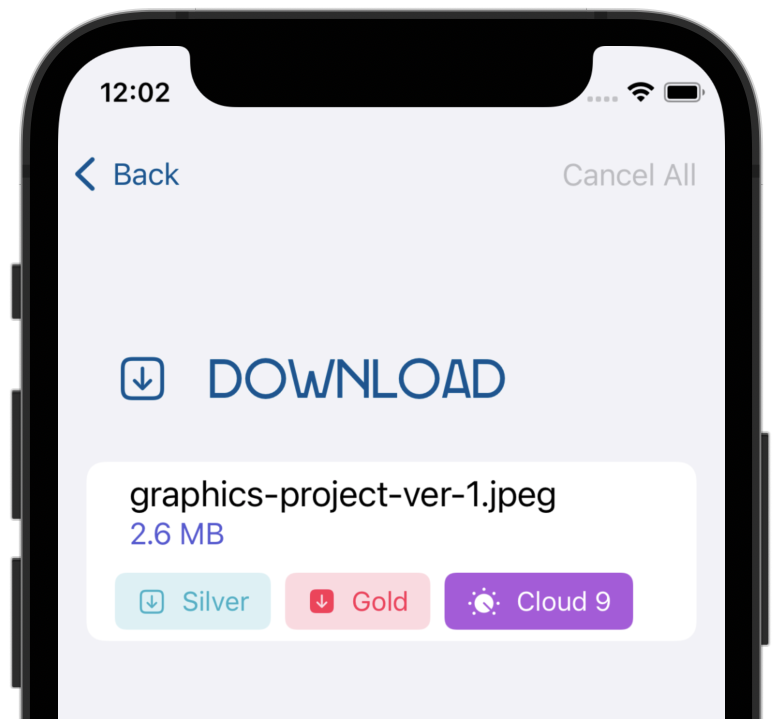
이전(previous) 장(chapter)에서는, 전체 파일(complete file)을 한 번에(in one go) 가져오고(fetches) 화면(onscreen) 미리 보기(preview)를 제공(presents)하는 Silver 다운로드(download option)를 코딩(coded)했다.
파일(file) 다운로드(downloads) 시, 진행률(progressive) UI 업데이트(updates)를 제공(provides)하는 Gold 다운로드(download option)를 구현(implementing)하면서 이 장(chapter)을 시작한다.
서버(server)에서 바이트(bytes)의 비동기(asynchronous) 시퀀스(sequence)로 파일(file)을 읽어(reading) 이를 수행(achieve)할 수 있다. 이렇게 하면 파일(file) 내용(contents)을 수신(receive)할 때 진행률 표시줄(progress bar)을 업데이트(update)할 수 있다.
Adding your asynchronous sequence
SuperStorage 프로젝트(project)를 열고(open) SuperStorageModel.swift로 이동하여,
downloadWithProgress(fileName:name:size:offset:)로 스크롤(scrolling)한다. 올바른(correct) 서버(server) URL을 생성(create)하는 코드(code)가 이미(already) 포함(contains)되어 있다. 또한addDownload(name:)를 호출(calls)하여 화면(onscreen)에 다운로드(download)를 추가(add)한다.다음으로(next),
downloadWithProgress(fileName:name:size:offset:)의return행(line) 앞에 다음 코드(code)를 삽입(insert)한다:let result: (downloadStream: URLSession.AsyncBytes, response: URLResponse)이전과 다르게(unlike before),
URLSession.data(for:delegate:)를 사용하여(used)Data를 반환(return)할 때,URLSession.AsyncBytes를 반환(returns)하는 대체(alternative) API를 사용하게 된다. 이 시퀀스(sequence)는 URL 요청(request)에서 비동기적으로(asynchronously) 수신(receives)하는 바이트(bytes)를 제공(gives)한다.HTTP 프로토콜(protocol)을 사용하면, 서버(server)가 부분 요청(partial requests) 기능(capability)을 지원(supports)하도록 정의(define)할 수 있다. 서버(server)가 이를 지원(supports)하는 경우, 한 번에(at once) 전체(entire) 응답(response) 대신(instead of), 응답(response)의 바이트 범위(byte range)를 반환(return)하도록 요청(ask)할 수 있다. 좀 더 흥미롭게(interesting) 만들기 위해, 앱(app)에서 표준(standard) 및 부분(partial) 요청(requests)을 모두 지원(support)하도록 한다.

부분 응답(partial response) 기능(functionality)을 사용하면, 파일(file)을 부분(parts)으로 분할(split)해 병렬(parallel)로 다운로드(download)할 수 있다. 이 장(chapter)의 뒷부분(later)에서 Cloud 9 다운로드(download option)를 구현(implementing)할 때, 이 기능(functionality)이 필요하다.
계속해서(continue) 아래 코드(code)를 추가(adding)하여, 부분 파일(partial file)을 요청(request)한다:
if let offset = offset {
  let urlRequest = URLRequest(url: url, offset: offset, length: size)
  result = try await
    URLSession.shared.bytes(for: urlRequest, delegate: nil)

  guard (result.response as? HTTPURLResponse)?.statusCode == 206 else {
    throw "The server responded with an error."
  }
}
코드(code)가
offset을 지정(specifies)하는 경우, URL 요청(request)을 생성(create)하고URLSession.bytes(for:delegate:)에 전달(pass)한다. 그러면 응답(response)의 세부 정보(details) 튜플(tuple)과 파일(file)의 바이트(bytes)를 열거(enumerates)하는 비동기(async) 시퀀스(sequence)가 반환(returns)된다.이번에는 응답 코드(response code)가 성공적인(successful) 부분 응답(partial response)을 나타내는(indicating) 206인지 확인(check)한다.
다음으로(next), 일반적(regular)이고 부분적이지 않은(non-partial) 요청(request)을 처리(handles)하는 다음(following)
else블록(block)을 추가(append)하여if문(statement)을 완성(complete)한다:else { result = try await URLSession.shared.bytes(from: url, delegate: nil) guard (result.response as? HTTPURLResponse)?.statusCode == 200 else { throw "The server responded with an error." } }위의 코드(code)는 200 상태(status)와 성공적인(successful) 서버(server) 응답(response)을 확인(checking)한다는 점을 제외(except)하면, 이전에(previously) 수행한 것과 비슷(similar to)하다.
부분(partial) 요청을 하든 표준(standard) 요청(request)을 하든 관계없이(regardless of),
result.downloadStream에서 사용할(available) 수 있는 비동기(asynchronous) 바이트(byte) 시퀀스(sequence)가 생성된다(end up with).Using ByteAccumulator
이제(now), 응답(response) 바이트(bytes)에 대한 반복 작업(iterating over)을 시작(start)할 때이다. 이 장(chapter)에서는, 사용자 정의(custom) 논리(logic)를 구현(implement)하여 바이트(bytes)를 반복(iterate over)한다. starter 프로젝트(project)에 포함된(included with)
ByteAccumulator유형(type)을 사용하여 시퀀스(sequence)에서 바이트(bytes) 배치(batches)를 가져온다(fetch).파일(file)을 배치(batches) 처리(process)해야 하는 이유는 무엇일까? 더 재미(fun)있을 뿐만 아니라, 파일(file)에는 수백만(millions) 또는 수십억(billions) 바이트(bytes)가 포함(contain)될 수 있다. 각(each) 바이트(byte)를 가져온(getting) 후에 UI를 업데이트(update)하고 싶지 않을 수도 있다.
ByteAccumulator는 파일(file)의 모든 내용(contents)을 수집(collect)하고, 각 바이트 배치(each batch of bytes)를 가져온(fetching) 후에만 주기적으로(periodically) UI를 업데이트(update)하도록 하 도움이 된다:
Note: 누산기(accumulator)가 어떻게 작동하는지 궁금(curious)하다면 ByteAccumulator.swift를 살펴본다.
ByteAccumulator를 사용하려면SuperStorageModel에서downloadWithProgress(fileName:name:size:offset:)에 대한 반환(return) 문(statement) 앞에 이 코드(code)를 추가(append)한다:var asyncDownloadIterator = result.downloadStream.makeAsyncIterator()AsyncSequence에는 시퀀스(sequence)에 대한 비동기(asynchronous) 반복자(iterator)를 반환(returns)하는makeAsyncIterator()메서드(method)가 있다. 반환된(returned)asyncDownloadIterator를 사용하여(use) 한 번에 하나씩(one at a time) 바이트(bytes)를 반복(iterate over)한다.이제(now), 누산기(accumulator)를 추가(add)하고 모든 바이트(bytes)를 수집(collect)하려면, 누산기(accumulator)를 생성(creates)하고 사용(uses)하는 코드를 추가한다:
var accumulator = ByteAccumulator(name: name, size: size) while await !stopDownloads, !accumulator.checkCompleted() { }while반복문(loop)의 첫 번째 조건(condition)은 모델(model)의stopDownloads플래그(flag)가 설정(set)되지 않았는지 확인(checks)한다. 잠시 후(in a bit), 이 플래그(flag)를 다시 사용한다.stopDownloads의 현재 값(current value)을 읽으려면(read),await를 사용(use)해야 한다.stopDownloads는 메인 액터(main actor)에 대해 격리(isolated)되어 있으므로 해당 값(value)에 접근(access)하려면 반드시 await를 사용(use)해야 한다. 액터(actors)에 대한 것은 8장 "Getting Started with Actors"에서 배우게 될 것이다.두 번째 조건(condition)은
checkCompleted()가false를 반환(returns)하는지 확인(checks)한다. 이는 누산기(accumulator)가 아직 더 많은 바이트(bytes)를 수집(collect)할 수 있음을 의미(means)한다.이 두 조건(conditions)을 조합(combination)하면 외부 플래그(external flag)
stopDownloads가 해제(lifted)되거나 누산기(accumulator)가 다운로드(download)를 완료(completes)할 때까지 반복문(loop)을 실행(run)할 수 있는 유연성(flexibility)을 제공(gives)한다. 이 설계(design)를 사용하면, 필요한 경우(needed) 외부 플래그(external flag)를 사용하여 다운로드(download) 코드(code)를 쉽게(easily) 취소(cancellable)할 수 있다.다음으로(next),
while본문(body) 내부(inside)에 다음 코드를 삽입(insert)한다:while !accumulator.isBatchCompleted, let byte = try await asyncDownloadIterator.next() { accumulator.append(byte) }특정(particular) 배치(batch)가 가득 찰(full) 때까지 실행(runs)되는 두 번째
while반복문(loop)을 사용한다. 반복(loop) 조건(condition)은 외부(outer)while과 유사(similar to)하다.isBatchCompleted플래그(flag)가true이거나 바이트(byte) 시퀀스(sequence)가 완료(completes)될 때까지 바이트(bytes)를 계속 수집(keep collecting)한다.코드(code)가 너무 단순(simple)해서 거기에 있는 단일(single)
await키워드(keyword)가 아니었다면, 파일(file)을 다운로드(downloading)하는 동시에 비동기적으로(asynchronously) 처리(processing)하고 있다는 것을 알 수 없었을 것이다.Updating the progress bar
배치(batch)가 완료(completes)되면,
while반복문(loop) 후에 실행(execution)이 계속(continues)된다. 여기가 다운로드(download) 진행률 표시줄(progress bar)을 업데이트(update)하기에 완벽한 위치(perfect place)이다.batch의 후행 클로저(trailing closure) 내부(inside)에 있는 내부(inner)while반복문(loop) 뒤에 다음(following) 코드(code)를 삽입(insert)한다:let progress = accumulator.progress Task.detached(priority: .medium) { await self .updateDownload(name: name, progress: progress) } print(accumulator.description)위(above)의 코드(code)에서 아직 다루지(covered) 않은 몇 가지 새로운 것(novelties)을 확인할 수 있다.
먼저(first),
Task.detached(...)를 사용(use)한다. 이것은Task(priority:operation:)로 작업(task)을 생성(creating)하는 다른 버전(rogue version)이다. 분리된(detached) 작업(task)은 부모의 우선 순위(parent’s priority), 작업 저장소(task storage), 실행 액터(execution actor)등을 상속(inherit)하지 않는다.Note: 일반적으로(generally speaking) 문서(documentation)에서는 동시성(concurrency) 모델(model)의 효율성(efficiency)에 부정적인 영향(negatively affects)을 미치기 때문에
Task.detached(...)를 사용하지 말 것을 권장(recommends)한다. 그러나 (however)이 경우에서 해당 구문(syntax)을 학습(learn)하기 위해 사용하는 것은 아무런 문제가 되지 않는다.중간(medium) 우선 순위(priority)를 명시적으로(explicitly) 설정(setting)하여 작업(task)을 생성(create)하므로, 진행 중(ongoing)인 다운로드(download) 작업(task)이 느려질(slowing) 가능성은 없다. 해당 작업(task)은 사용자의 행동(user action)에 의해 시작된 작업(user action)이므로
userInitiated우선 순위(priority)로 실행(runs)된다.또 다른 흥미로운 점(interesting aspect)은 클로저(closure)에서
self를 캡처(capture)한다는 것이다. 앞서(earlier) 새 구문(syntax)을 사용하면 메모리를 수동으로(manually) 관리(manage)할 필요가 거의(mostly) 없다(obliterates)는 것을 배웠다.SuperStorageModel은 클래스(class)이므로 참조(reference) 유형(type)이다. 즉, 이스케이프 클로저(escaping closures)를 사용(use)할 때, 일반적인(usual) 메모리(memory) 관리(management) 규칙(rules)이 적용(apply)된다. 여기서는 그렇지 않지만, 순환 참조(reference cycle)을 만들 가능성이 있다면[weak self]를 사용하여 약하게(weakly) 캡처(capture)해야 한다.마지막으로 중요한 것은(last but not least), 현재(current)
progress를 계산(calculate)하여updateDownload(...)에 전달(hand it over)하고 현재(current) 누산기(accumulator)의 상태(state)를 출력(output) 콘솔(console)에 출력(print)하여 개발 중(during development)에 다운로드(downloads)를 추적(track)할 수 있도록 하는 것이다.올바른 위치(right places)에 코드(code)를 삽입(inserted)했는지 확인(make sure)하기 위해, 아래에서 완료된(completed) 반복문(loop) 코드(code)를 찾을(find) 수 있으므로 해당 코드와 비교(compare)할 수 있다:
while await !stopDownloads, !accumulator.checkCompleted() {
  while !accumulator.isBatchCompleted,
    let byte = try await asyncDownloadIterator.next() {
    accumulator.append(byte)
  }
  let progress = accumulator.progress
  Task.detached(priority: .medium) {
    await self
      .updateDownload(name: name, progress: progress)
  }
  print(accumulator.description)
}
Returning the accumulated result
마지막(last) 섹션(sections)에서 작업한 메서드(method)를 마무리(wrap up)하려면,
return Data()행(line)을 다음으로 바꾼다(replace):return accumulator.data새로(newly) 완료된(completed) 메서드(method)는 다운로드(download) 시퀀스(sequence)를 반복(iterates over)하고 모든 바이트(bytes)를 수집(collects)한다. 그런 다음 각(each) 배치(batch)가 끝날 때 파일(file) 진행률(progress)을 업데이트(updates)한다.
DownloadView.swift로 전환(switch)하고,
downloadWithUpdatesAction이라는 클로저(closure) 매개변수(parameter)로 스크롤(scroll)한다. 빈(empty) 클로저(closure) 안(inside)에 다음 코드(code)를 삽입(insert)한다:isDownloadActive = true Task { do { fileData = try await model.downloadWithProgress(file: file) } catch { } isDownloadActive = false }위(above)의 코드(code)는 이전(previous) 장(chapter)에서
downloadSingleAction에 추가한(added) 코드(code)와 동일(identical)하다. 그러나(however) 이번에는downloadWithProgress(file:)를 호출(calls)하여 진행률 표시줄(progress bar)에 실시간(real-time) 업데이트(updates)를 제공(provide)한다.이 프로젝트(project)는 book-server 웹(web) API와 상호 작용(interacts)한다. iOS 시뮬레이터(Simulator)에서 코드(code)를 확인(testing)하기 전에 컴퓨터(computer)에서 이 서버 앱(server app)을 실행(running)하고 있는지 확인(make sure)한다. 서버(server)를 시작(start)하려면, 이 책의 materials-repository에서 server 폴더(folder)로 이동하고
swift run을 입력(enter)한다. 자세한(detailed) 내용(steps)은 1장(chapter), "Why Modern Swift Concurrency?"에서 설명했다.빌드(build)하고 실행(run)한다. 파일(file)을 선택(select)하고 Gold 선택사항(option)을 탭(tap)하여 새 코드(code)를 확인(test)한다. 파일(file)이 다운로드(downloads)되면서, 진행률 표시줄(progress bar)이 반복적으로(repeatedly) 업데이트(update)되는 것을 확인할 수 있다:
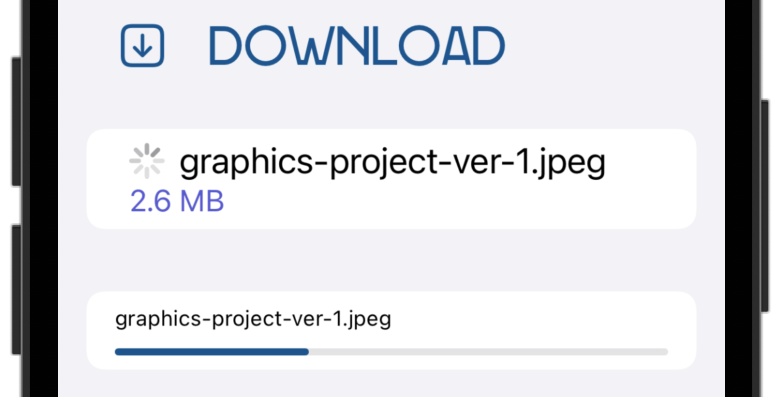
각(each) 배치(batch) 후에
while반복문(loop)이 출력(prints)하는 콘솔(console) 출력(output)을 확인하면 더욱 안심(reassuring)할 수 있다:[graphics-project-ver-1.jpeg] 0.9 MB [graphics-project-ver-1.jpeg] 1 MB [graphics-project-ver-1.jpeg] 1.2 MB [graphics-project-ver-1.jpeg] 1.3 MB [graphics-project-ver-1.jpeg] 1.4 MB [graphics-project-ver-1.jpeg] 1.6 MB ...이 출력(output)은 진행률 표시줄(progress bar)을 업데이트(updating)하는 다운로드(download) 시점(point)을 알려(tells)주며, 각 배치(batch)의 크기(size)를 쉽게(easily) 계산(calculate)할 수 있다.
축하한다(congratulations). 이제
AsyncSequence사용(using)에 대해 알아야 할 대부분의 내용을 알게 되었다.Canceling tasks
동시성(concurrency) 모델(model)이 효율적으로(efficiently) 작동하려면 불필요한(unneeded) 작업(tasks)을 취소(canceling)하는 것이 필수적(essential)이다.
TaskGroup(이 책의 뒷부분에서 다룰(cover) 예정) 또는async let과 같은 새로운(new) API 중 하나를 사용(use)하면, 일반적으로(usually) 시스템(system)이 필요(needed)할 때 자동으로(automatically) 작업(task)을 취소(cancel)할 수 있다.그러나(however) 다음(following)
TaskAPI를 사용(using)하여 작업 기반(task-based) 코드(code)에 대한 보다 세분화된(finer-grained) 취소(cancellation) 전략(strategy)을 구현(implement)할 수 있다:- Task.isCancelled: 작업(task)이 아직 활성(alive) 상태이지만, 마지막(last) 일시 중단 지점(suspension point) 이후 취소(canceled)된 경우
true를 반환(returns)한다. - Task.currentPriority: 현재(current) 작업(task)의 우선 순위(priority)를 반환(returns)한다.
- Task.cancel(): 작업(task) 및 해당 하위 작업(child tasks)의 취소(cancel)를 시도(attempts)한다.
- Task.checkCancellation(): 작업(task)이 취소(canceled)되면,
CancellationError를 발생(throws)시켜 오류 컨텍스트(throwing context)를 더 쉽게(easier) 종료(exit)할 수 있다. - Task.yield(): 현재(current) 작업(task)의 실행(execution)을 일시 중단(suspends)하여, 시스템(system)에서 자동으로(automatically) 취소(cancel)하고 우선 순위(priority)가 더 높은 다른 작업(task)을 실행(execute)할 수 있는 기회(chance)를 제공(giving)한다.
비동기(asynchronous) 작업(tasks)을 작성(writing)할 때,
checkCancellation()과 같은 오류 함수(throwing function)가 필요한지 또는isCancelled를 확인(checking)하여 제어 흐름(control flow)을 직접 관리(manage)할지에 따라 사용할 API를 선택(choose)한다.다음(next) 섹션(section)에서는 더 이상 필요하지 않은 다운로드(download) 작업(tasks)을 취소(cancel)하는 사용자 정의(custom) 논리(logic)를 구현(implement)한다.
Canceling an async task
적시에(timely) 작업(tasks)을 취소(canceling)하는 것이 중요(important)한 이유를 확인(demonstrate)하려면 앱(app)에서 다음(following) 시나리오(scenario)를 실행(run)해 본다:
TIFF 파일(files) 중 하나를 선택(select)하고 Gold를 탭(tap)하여 진행률(progress) 업데이트(updates)와 함께 다운로드(download)를 시작(start)한다. 누산기(accumulator)가 점점 더 많은 파일(file) 내용(content)를 수집(collects)함에 따라 Xcode 콘솔(console)에 로그(logs)가 나타난다(appear).
파일(file)이 계속 다운로드(still downloading)되는 동안 < Back 버튼(button)을 탭(tap)하고 콘솔(console)을 관찰(observe)한다. 해당 다운로드(download)는 전체 파일(whole file)을 다운로드(downloads)할 때까지 계속 진행된다(keeps going).
Manually canceling tasks
지금까지(so far), 뷰(view)가 사라질(disappears) 때 코드(code)를 자동으로(automatically) 취소(canceling)하는
.task(...)뷰 수정자(view modifier) 안(inside)에 비동기(async) 코드(code)를 작성(wrote)했다. 그러나 다운로드(download) 버튼(buttons)에 대한 작업(actions)은.task()에 없으므로, 해당 비동기(async) 작업(operations)을 취소(cancel)할 수 없다.이 문제(issue)를 해결(fix)하려면, 다운로드(download) 작업(tasks)을 수동으로(manually) 취소(cancel)해야 한다.
DownloadView에 새로운 상태(state) 속성(property)을 추가(adding)한다:@State var downloadTask: Task<Void, Error>?downloadTask에서 결과(result)를 반환(returns)하지 않고 오류(error)를 발생(throw)시킬 수 있는 비동기(asynchronous) 작업(task)을 저장(store)한다.Task는 다른 유형과(type) 마찬가지로 뷰(view), 모델(model) 또는 다른 범위(scope)에 저장(store)할 수도 있다.Task는 성공(successful)하면 아무 것(anything)도 반환(return)하지 않으므로, 성공(success)은Void이다. 마찬가지로(likewise) 실패(failure)하면Error를 반환(return)한다.다음으로(next),
downloadWithUpdatesAction으로 다시 스크롤(scroll back)하여Task {행(line)을 다음으로 바꾼다(replace):downloadTask = Task {그러면 나중에(later) 접근(access)할 수 있도록 작업(task)이
downloadTask에 저장(stores)된다. 가장 중요한 것은(most importantly), 작업(task)을 마음대로(at will) 취소(cancel)할 수 있다는 것이다.사용자(user)가 메인 화면(main screen)으로 돌아가면 작업(task)을 취소(cancel)한다.
.onDisappear(...)에 이미 일부 코드(code)가 있다.model.reset()바로(immediately) 뒤(after)에 다음 행(line)을 추가(add)한다:downloadTask?.cancel()downloadTask를 취소(canceling)하면, 모든 하위(child) 작업(tasks)도 함께 취소(cancel)된다.앱(app)을 빌드(build)하고 실행(run)한다. 그런 다음(then), 위(above)의 테스트 시나리오(test scenario)를 실행(run)해 본다. 기본 메인 화면(main screen)으로 돌아가면, 콘솔(console)의 진행(progress) 로그(logs)가 중지(stop)되는 것을 알 수(notice) 있다.
Storing state in tasks
각(each) 비동기(asynchronous) 작업(task)은 우선 순위(priority), 액터(actor) 등으로 구성된(consists of) 자체(own) 컨텍스트(context)에서 실행(executes)된다. 하지만 작업(task)은 다른 작업(tasks)을 호출(call)할 수 있다는 것을 잊어선(forget) 안 된다. 각각(each)은 다양한(different) 함수(functions)와 상호 작용(interact)할 수 있으므로, 런타임(runtime)에 공유(shared) 데이터를 분리(isolating)하는 것이 어려울(difficult) 수 있다.
이 문제를 해결(address)하기 위해, Swift는 주어진 속성(property)을 지역 작업(task-local)으로 표시(marks)하는 새로운 속성 래퍼(property wrapper)를 제공(offers)한다.
SwiftUI에서 객체(object)를 환경(environment)에 주입(injecting)하는 것에 대해 잠시 생각(think for a moment)해 본다. 해당 객체(object)를 해당(immediate)
View뿐만 아니라, 모든 하위 뷰(child views)에서도 사용할(available) 수 있다.마찬가지로(similarly) 지역 작업(task-local) 값(value)을 바인딩(binding)하면 해당(immediate) 작업(task)뿐만 아니라, 모든 하위 작업(child tasks)에서도 사용할 수 있다:

이 장(chapter)의 해당 섹션(section)에서는, 지역 작업(task-local) 저장소(storage)를 사용하여 호출 컨텍스트(calling context)에 따라(depending on) 함수(function)의 동작(behavior)을 변경하는 방법을 배운 다(learn).
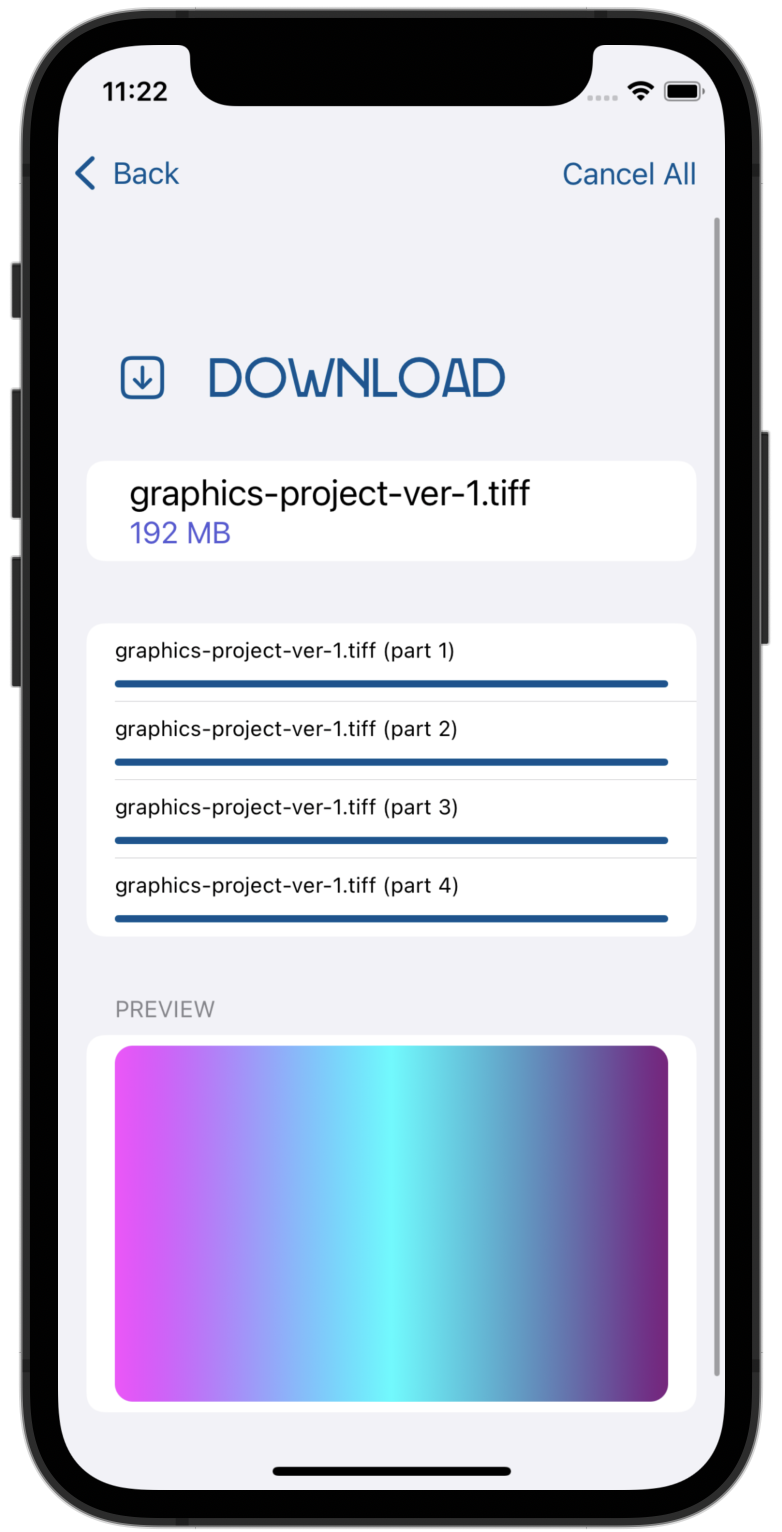
보다 구체적으로(more specifically), 다운로드 화면(download screen)에서 Cancel All 버튼(button)에 대한 작업(action)을 코딩(code)한다.
Adding a partial image preview
JPEG 형식(format)은 이미지(images)를 부분적으로(partially) 디코딩(decoding)할 수 있지만, TIFF와 같은 다른 형식들(formats)은 부분 미리보기(partial preview)를 허용(allow)하지 않는다. 따라서 JPEG 파일(files)에 대한 부분 미리보기(partial preview)만 지원(support)한다.
다음과 같은 사용자 정의(custom) 논리(logic)를 개발(develop)한다: 사용자(user)가 JPEG 이미지(image)를 다운로드(downloading)하고 완료되기(finishes) 전에 취소(cancels)하는 경우, 부분적으로(partially) 다운로드된(downloaded) 미리 보기(preview)를 표시한다. 다른 이미지(image) 유형(types)의 경우에는 단순히 다운로드(download)를 중단(abort)하면 된다.
SuperStorageModel.swift를 열고(open),
SuperStorageModel에 새 속성(property)을 추가(add)한다:@TaskLocal static var supportsPartialDownloads = false사용자(user)가 JPEG 다운로드(download)를 시작(initiates)하면,
supportPartialDownloads를true로 설정(set)한다. 그런 다음SuperStorageModel에 새 코드(code)를 추가하여 플래그(flag) 값(value)에 따른(based on) 적절한(appropriate) 동작(behavior)을 제공(provide)한다.Note: 지역 작업(task-local) 속성(properties)은 유형(type)에 대한 정적(static)이거나 전역(global) 변수(variables)여야 한다.
@TaskLocal속성 래퍼(property wrapper)는 비동기(async) 작업(task)에 값을 바인딩(bind a value)하는, 간단히 말해(simply speaking) 작업(task) 계층 구조(hierarchy)에 값을 주입(inject)할 수 있는withValue()메서드(method)를 제공(offers)한다.DownloadView.swift를 연다(open).
downloadWithUpdatesAction클로저(closure) 매개변수(parameter)에서fileData = try await model.downloadWithProgress(file: file)행(line)을 다음으로 바꾼다(replace):try await SuperStorageModel .$supportsPartialDownloads .withValue(file.name.hasSuffix(".jpeg")) { fileData = try await model.downloadWithProgress(file: file) }여기에서(here),
withValue(_:)를 사용(use)하여, 파일(file) 확장자(extension)에 따라(based on) 해당 다운로드(downloads)가 부분 다운로드(partial downloads)를 지원(supports)하는지 여부를 바인딩(bind)한다. 바인딩된 값(value bound)으로downloadWithProgress(file:)를 호출(call)한다.이 방법으로 여러 값(multiple values)을 바인딩(bind)할 수 있으며, 다음과 같이 내부(inner) 바인딩(bindings)의 값(values)을 덮어쓸(overwrite) 수도 있다(해당 코드(code)를 입력(enter)하지 않는다):
try await $property1.withValue(myData) {
  ...
  try await $property2.withValue(myConfig1) {
    ...
    try await serverRequest()
    try await $property2.withValue(myConfig2) {
      ...
    }
  }
}
어떤 경우든(in any case), 너무 많은(too many) 지역 작업(task-local) 스토리지(storage) 속성(properties)을 사용하면 각(each) 바인딩(binding)에 대한 코드(code)를 클로저(closure)로 래핑(wrap)해야 하므로 읽고(read) 추론(reason)하기 어려울(difficult) 수 있음을 알 수 있다.
Note: 그런 의미에서(in that sense), 작업(task) 저장소(storage)는 위(above)의 예(example)에서와 같이 별도의(separate) 단일 값(single values)이나 플래그(flags)가 아닌 전체 구성 객체(complete configuration objects) 또는 전체 데이터 모델(whole data models)과 같이 적은(fewer) 수의 값(values)을 바인딩(binding)하는 데 유용(useful)하다.
Adding the “Cancel All” functionality
DownloadView.swift에서 파일(file) 아래쪽(bottom)으로 스크롤(scroll down)하여
.toolbar(...)를 찾는다. 여기에서 Cancel All 버튼(button)을 정의(define)한다.action클로저(closure)가 비어(empty) 있으므로, 내부(inside)에 다음 코드(inside)를 추가(add)한다:model.stopDownloads = true이번에는(this time),
.onDisappear(...)에서 했던 것처럼 다운로드(download) 작업(task)을 완전히(altogether) 취소(canceling)하는 대신,SuperStorageModel에서stopDownloads플래그(flag)를 킨다(turn on). 다운로드(downloading)하는 동안 이 플래그(flag)를 관찰(observe)하게 된다.true로 변경(changes)되면, 내부적으로(internally) 작업(tasks)을 취소(cancel)해야 한다.그렇게 하려면(to do that), SuperStorageModel.swift를 열고(open)
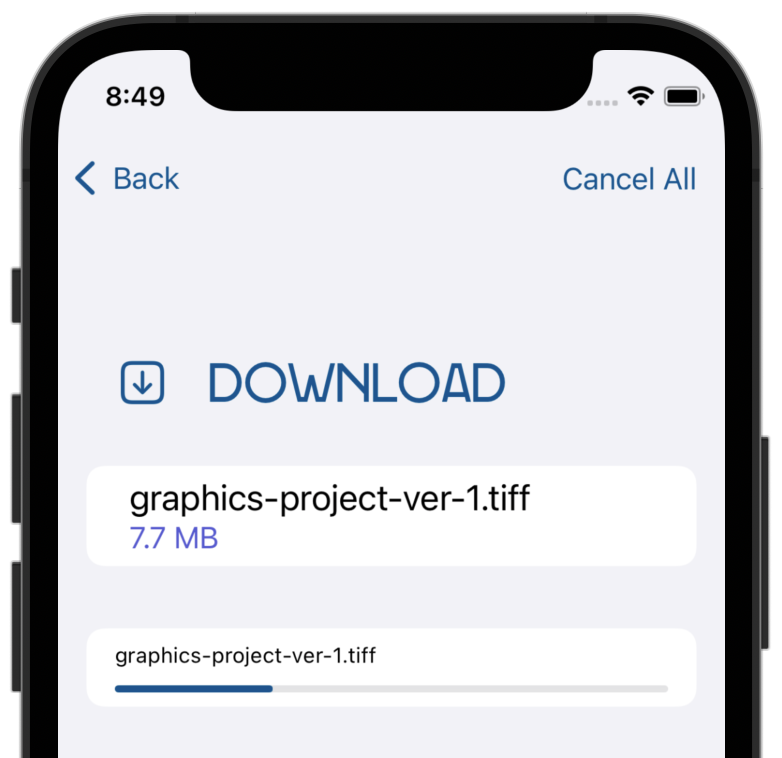
downloadWithProgress(fileName:name:size:offset:)로 스크롤(scroll)한다. 해당 함수(function)의 맨 아래(bottom)에서return행(line) 바로 앞에 다음 코드(code)를 삽입(insert)한다:if await stopDownloads, !Self.supportsPartialDownloads { throw CancellationError() }이것은 사용자 정의(custom) 취소(cancellation)에 대한 작업별(task-specific) 동작(behavior)이다. 각(each) 배치(batch)를 다운로드(downloaded)한 후
stopDownloads가true인지 확인(check)하고, 그렇다면 다운로드(download)가 부분 미리 보기(partial preview)를 지원(supports)하는지 여부도 확인(check)한다.그러면(then):
Self.supportsPartialDownloads가false이면,CancellationError를 발생시켜(throw) 오류(error)와 함께 함수(function)를 종료(exit)한다. 그러면 다운로드(download)가 즉시(immediately) 중지(stops)된다.Self.supportsPartialDownloads가true이면, 실행(execution)을 계속(continue)하고 부분적으로(partially) 다운로드된(downloaded) 파일(file) 내용(content)를 반환(return)한다.
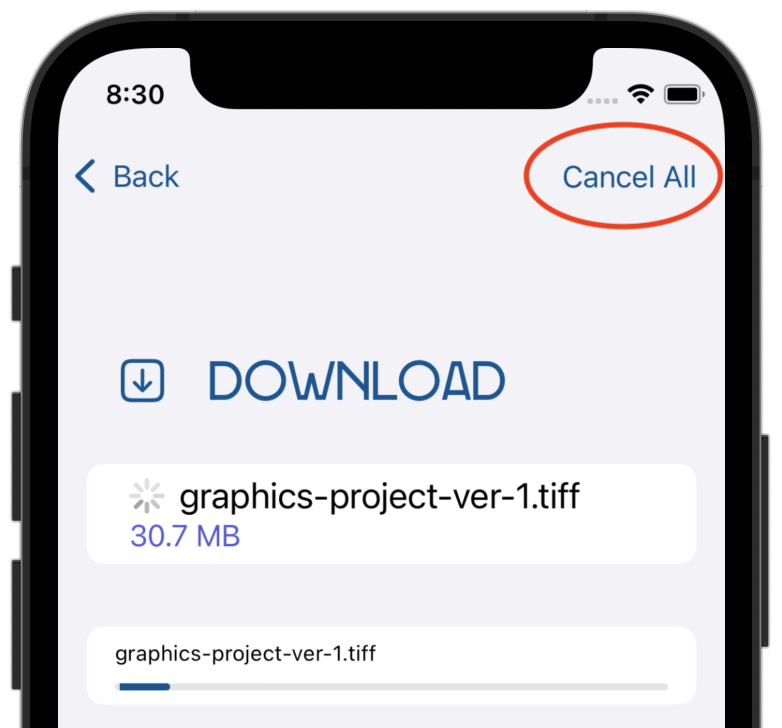
새로운 기능(feature)을 사용해 볼 때이다. 빌드(build)하고 실행(run)한다. TIFF 이미지(image)를 선택(select)한 다음, Gold 요금제(plan) 다운로드(download)를 시작(start)한다. 잠시 후(after a moment), Cancel All를 누른다(tap).
보다시피(as you can see), 다운로드(download)가 중지(stops)된다. 기존(existing) 오류 처리(error-handling) 코드(code)는
CancellationError를 포착(catches)하여 진행률 표시줄(progress bar)을 추가로(further) 업데이트(updating)하지 않고 스피너(spinner) 뷰(view)를 숨긴다.이제(now), JPEG 이미지(image)를 선택(picking)하고 동일한(same) 동작(routine)을 실행(running)해 본다:
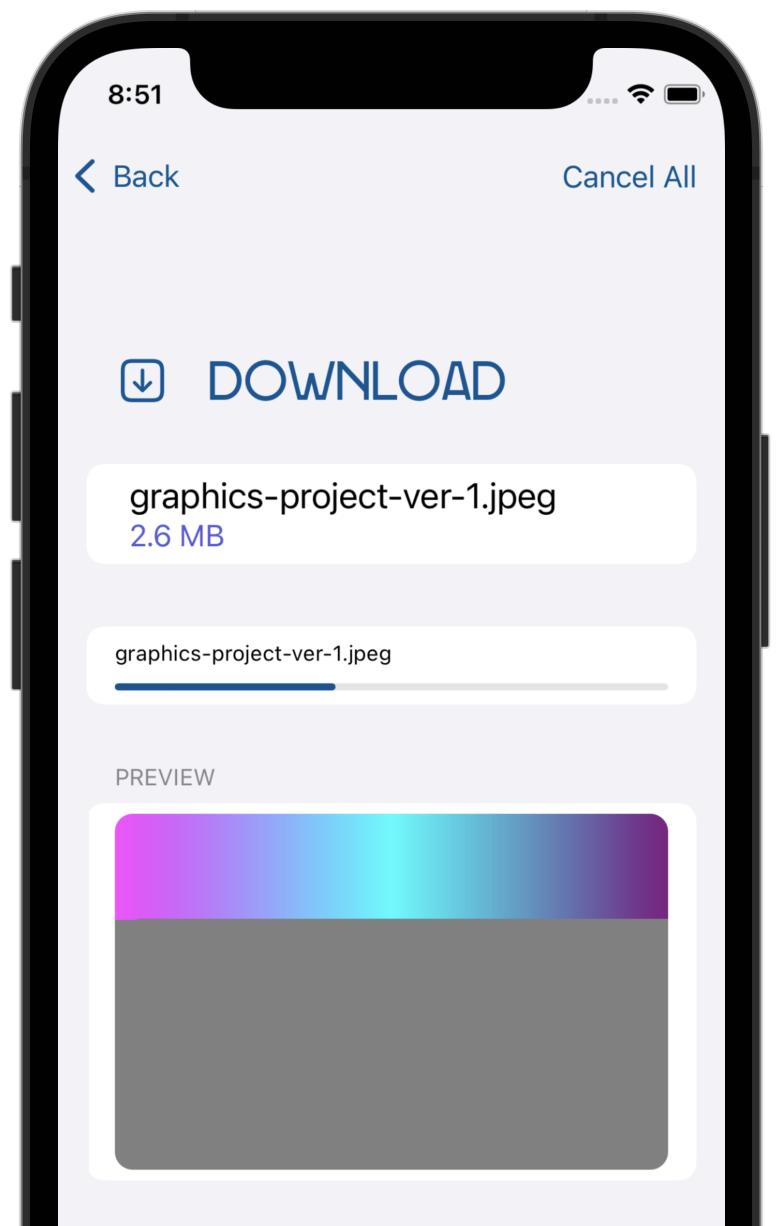
JPEG 파일(files)의 특별한 점(special behavior)은 부분적으로(partially) 다운로드된(downloaded) 이미지(image)를 반환(returns)하여,
DownloadView가 성공적으로(successfully) 다운로드된(downloaded) 일부분(part)의 미리 보기(preview)를 표시(displays)한다.Bridging Combine and AsyncSequence
Combine은 반응형(reactive) 스트림(streams specification)을 기반(based on)으로 하는 Apple의 반응형(reactive) 프로그래밍(programming) 프레임워크(framework)이다. 문법(syntax)은 RxSwift 및 Rx 표준(standard)에 영감 받은(inspired) 다른 프레임워크(frameworks)와 유사하다(similar to). Combine: Asynchronous Programming With Swift 책(book)에서 자세히 알아볼 수 있다.
Apple은 Combine을 Foundation과 Core Data와 같은 여러(several) 주요(key) 프레임워크(frameworks)에 통합(integrated)했다:

Combine의 주춧돌(cornerstone)인
Publisher프로토콜(protocol)의 단순함(simplicity)은 이를 보편적(universal)이고 쉽게(easy to) 채택(adopt)할 수 있도록 한다. publisher는 0(zero) 또는 하나 이상(one or more)의 값(values)을 비동기로(asynchronously) 내보낼(emit) 수 있다. 이는 선택적(optionally)으로, 성공(success) 또는 실패(failure)로 완료(complete)할 수 있다:
잠깐 기다려라(wait a minute).
이는 비동기(async) 시퀀스(sequence)와 거의 비슷해(more or less precisely) 보인다. 사용자 정의(own) Combine 코드(code)뿐만 아니라, Apple의 모든 기존(existing) Combine 통합(integrations)과 함께
async/await를 사용할 수 있다면 환상적(fantastic)일 것이다.그리고 다행스럽게도(fortunately), Apple은 이를 위한 손쉬운(easy) 인터페이스(interface)를 제공(offers)한다.
Adding a progress timer
이 장(chapter)의 이 섹션(section)에서는, 사용자의 다운로드(download) 시간을 실시간으로(in real time) 보여주는 타이머(timer)를 추가(add)한다:
여느 때와 마찬가지로(as usual) starter 프로젝트(project)에는 이미(already) 필요한 UI 코드(code)가 포함(includes)되어 있다.
DownloadView에는 진행률 표시줄(progress bar) 아래(below)에 경과 시간(duration)을 표시(displays)하는duration상태 속성(state property)이 있다.타이머(timer)에 대한 방침(plan)은
isDownloadActive가true로 변경(changes)될 때마다(whenever), 새 비동기(async) 작업(task)을 생성하고, 해당 작업(task)에서 Combine 타이머(timer)를 생성(create)하여 UI를 주기적으로(periodically) 업데이트(update)하는 것이다.먼저(first), Combine을 사용하고 있으므로, DownloadView.swift 상단(top)에 import 행(line)을 하나 더 추가한다:
import Combine그런 다음(then), 완료(done)되면 취소(cancel)할 수 있도록
DownloadedView에 새 속성(property)을 추가(add)하여 타이머(timer) 작업(task)을 저장(store)한다:@State var timerTask: Task<Void, Error>?다음으로(next),
@State var isDownloadActive = false를 찾는다. 이 플래그(flag)가true또는false로 설정(set)되었을 때, 가장 먼저 수행할 작업은 이전에(previously) 실행 중(running)인 타이머(timer) 작업(task)을 취소(cancel)하는 것이다.downloadTask에 다음didSet접근자(accessor)를 추가(add)하여 다음과 같이 표시한다:@State var downloadTask: Task<Void, Error>? { didSet { timerTask?.cancel() } }그런 다음(then), 사용자(user)가 새 다운로드(download)를 시작하는 경우 시작 시간(start time)을 기록(note)한다. 이 코드(code)를
didSet접근자(accessor) 안(inside)에 추가(add)한다:guard isDownloadActive else { return } let startTime = Date().timeIntervalSince1970나중에 타이머(timer)의 시작 시간(start time)을 기준으로(based on) 경과 시간(duration)을 계산(calculate)할 때 사용(use)한다.
Creating the Combine-based timer
Combine 타이머(timer)를 생성(create)하고 비동기(asynchronous)
values속성(property)을 사용하여 Combine 코드(code)를await와 함께 사용(use)할 수 있도록 프록시(proxy)해야 한다.startTime을 설정(setting)한 직후(immediately after), 이 코드(code)를 추가(add)하여Timerpublisher를 생성(create)한다:let timerSequence = Timer .publish(every: 1, tolerance: 1, on: .main, in: .common) .autoconnect() .map { date -> String in let duration = Int(date.timeIntervalSince1970 - startTime) return "\(duration)s" } .values이 코드(code)가 수행하는 단계별(step-by-step) 작업은 다음과 같다:
Timer.publish는 매초마다(every second) 현재 날짜(current date)를 내보내는(emits) Combine publisher를 생성(creates)한다.autoconnect를 사용하면 누군가 구독할 때마다(whenever someone subscribes), publisher가 자동으로(automatically) 틱(ticking)을 시작한다.map은 경과 시간(elapsed time)을 초(seconds) 단위로 계산(calculates)하여, 경과 시간(duration)을String으로 반환(returns)한다.- 마지막으로(finally), 가장 중요한 것(importantly)은
values가 평소(usual)처럼, 반복(loop over)할 수 있는 publisher 이벤트(events)의 비동기(asynchronous) 시퀀스(sequence)를 반환(returns)한다는 것이다.
실제로(in fact), publisher를 자동으로(automatically)
AsyncSequence로 래핑(wraps)하는values속성(property)에 접근(accessing)하여, 임의(any)의 Combine publisher와 함께for await를 사용할 수 있다.Note: 마찬가지로 Combine의
Future유형(type)은value라는 비동기(async) 속성(property)을 제공(offers)한다. 이를 통해 미래(future)의 결과(result)를 비동기(asynchronously)로 기다릴(await) 수 있다.Completing the timer
마지막으로(finally),
didSet접근자(accessor)에 이 코드(code)를 추가하여 새로운 비동기(asynchronous) 작업(task)을 생성(create)하고timerTask에 저장(store)한 다음 시퀀스(sequence)를 반복(loop over)한다:timerTask = Task { for await duration in timerSequence { self.duration = duration } }여기에서(here), timerSequence를 반복(iterate over)한다. 해당 반복(loop) 내(inside)에서 각(each) 값(value)을 self.duration에 할당(assign)한다. 섹션(section)의 시작 부분에서 언급(mentioned)한 것처럼, duration은 이미(already) UI에 연결(wired to)되어 있으므로 확인(test)만 해 보면 된다.
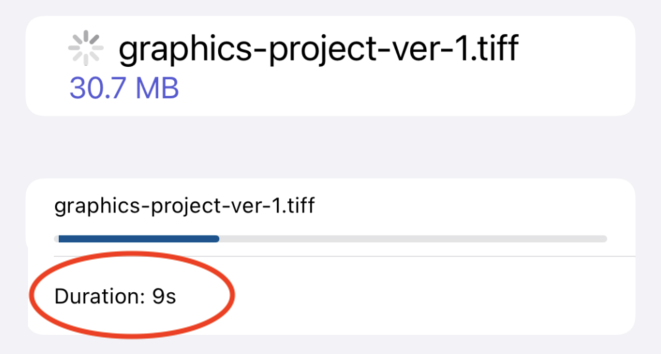
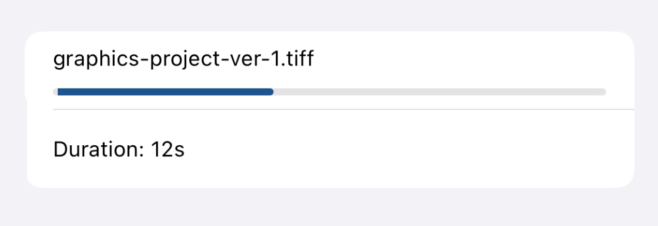
빌드(build)하고 실행(run)한다. 파일(file)을 선택(select)하고 Gold 다운로드(download) 버튼(button)을 누른다(choose). 진행률 표시줄(progress bar) 아래(below)에 경과 시간(duration) 요약(duration)이 표시(appears)되고, 매초(every second)마다 업데이트(updates)되는 것을 볼 수 있다.
이 장(chapter)을 마무리(wrapping up)하기 전에, 마지막으로 놓치기 쉬운(easy-to-miss) 문제(issue)가 있다: Cancel All를 탭(tap)해도, 타이머(timer)가 여전히 실행 중(still running)임음을 알 수(notice) 있다.
이를 해결(fix)하려면,
toolbar수정자(modifier)까지 스크롤(scroll down)하고Button의action클로저(closure)에 다음 행(line)을 추가(add)한다:timerTask?.cancel()이렇게 하면 Cancel All 버튼(button)을 누를 때마다(whenever) 보류 중(pending)인 타이머(timer)가 취소(cancel)된다. 그게 전부이다(that’s it)
이 장(chapter)의 마지막 작업(task)을 완료(completing)했다면, 비동기(async) 시퀀스(sequence)에 능숙(pro user)해 졌을 것이다. 그러나(however), 더 많은 연습이 필요하다면(hungry for more practice), 이 장(chapter)의 챌린지(challenge)를 끝까지(stay around) 수행해 본다.
Challenges
Challenge: Implementing concurrent downloads for the “Cloud 9” plan
자체적으로 구조화(structured)된 지역(local) 동시성(concurrency)을 생성해(creating)보기 위해, Cloud 9 다운로드(download option)를 구현(implement)한다. 걱정할 것 없다(don’t worry). 해당 starter 프로젝트(project)는 이미(already) 모든 비동기(non-concurrency) 코드(code)와 함께 제공되므로 필수적인(essential) 부분(bits and pieces)에 집중(focus on)할 수 있다.
먼저(first), DownloadView.swift로 이동(head to)하여
downloadMultipleAction클로저(closure) 매개변수(parameter) 내에서(inside) 모델(model)의multiDownloadWithProgress(file:)에 대한 호출(call)을 추가(add)한다. 이것는 다른(other) 다운로드(download) 버튼(buttons)에서 수행한 것과 동일하다(just like what you did).그런 다음(once you do that), SuperStorageModel.swift로 이동(head to)하여
multiDownloadWithProgress(file:)를 찾는다(find).파일(file) 다운로드(download)를 네 부분(parts)으로 나누고(break),
parts배열(array)에 저장(store)하는 코드가 함수(function)에 이미(already) 포함(includes)되어 있는 것을 알 수 있다. 각(each) 배열(array) 요소(element)에는 다음과 같은 속성(properties)이 있다:- name: part 이름이다.
- size: 바이트(bytes) 단위의 part 크기(size)이다.
- offset: 전체(complete) 파일(file) 내(within), part의 오프셋(offset)이다.
다행히도(luckily), 이것들은
downloadWithProgress(fileName:name:size:offset)이 예상(expects)하는 정확한(exact) 매개변수(parameters)이기도 하므로, 이를 구성(putting the pieces together)하는 것이 그리 어렵(difficult)지는 않을 것이다.다음을 수행해야 한다:
- 각각(each)의
downloadWithProgress(fileName:name:size:offset)를 사용하여 파일(file)의 일부(part)를 다운로드(download)하도록 네 가지 프로미스(promises)를async let으로 정의(define)한다.parts의 데이터(data)를 사용한다. - 4개의 다운로드(downloads)가 모두 함께 동시(concurrently) 실행(execute)되도록 기다린다(await).
- 모든 다운로드(downloads) 데이터(data)를 결합(combine)하여, 전체(complete) 파일(file) 내용(content)을
multiDownloadWithProgress(file:)의 반환 값(return value)으로 반환(return)한다.
위(above)의 모든 작업을 완료(done)한 후, Cloud 9 버튼(button)을 눌러(tapping) 다음과 같이 4개의 동시(simultaneous) 다운로드(downloads)가 시작(kicks off)되는지 확인(verify)한다:
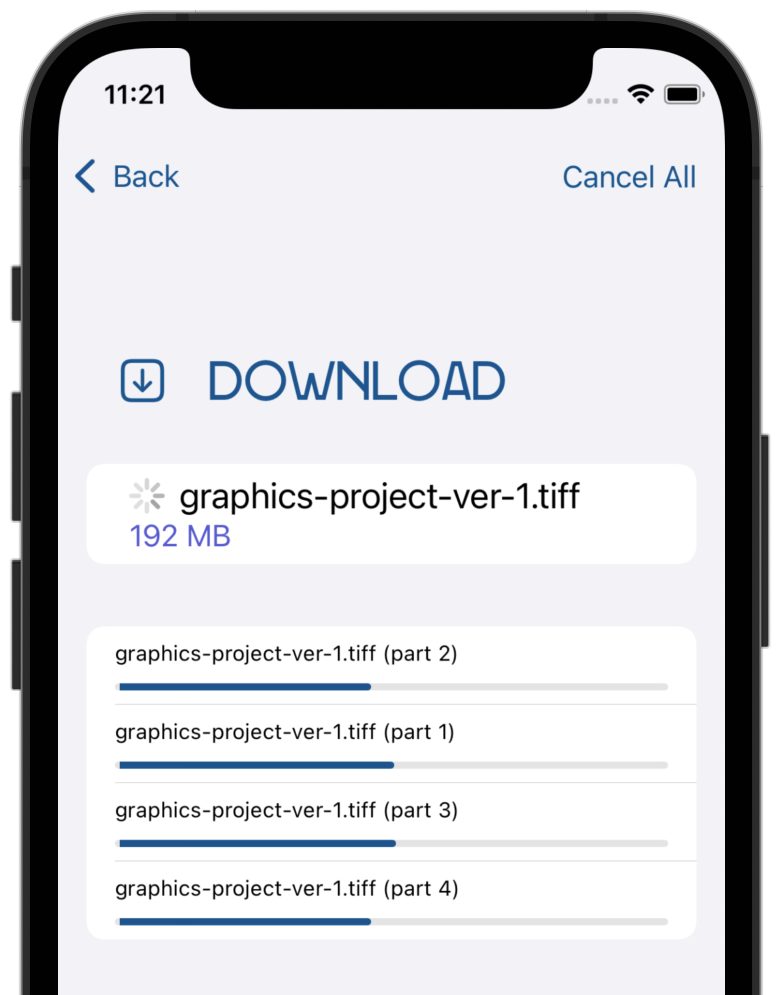
모든 것이 예상대로(expected) 작동(works)한다는 가장 확실한 신호(the most telling sign)는, 다운로드(download)가 끝날 때 이미지(image) 미리보기(preview)가 올바르게(correctly) 표시된다(appears)는 것이다:
문제가 있거나(get stuck) 스스로 작성한 코드(what I had in mind for this code)를 해답(solution)과 비교(compare)해 보고 싶다면, 이 장(chapter)의 자료(materials)에서 완성된(completed) 챌린지(challenge) 프로젝트(project)를 살펴본다(look at).
Key points
AsyncSequence는Sequence와 유사한(resembles) 프로토콜(protocol)이며, 일련의 값(sequence of values)를 비동기(asynchronously)로 반복(iterate over)할 수 있다.for await ... in구문(syntax)을 사용하거나,AsyncIterator를 직접(directly) 생성(creating)하여while반복문(loop)의 컨텍스트(context)에서next()메서드(method)로await하여 시퀀스(sequence)를 비동기(asynchronously)로 반복(iterate over)한다.Task는 현재 작업(current task)이 취소(canceled)되었는지 확인(check)할 수 있는 여러(several) API를 제공(offers)한다. 취소(cancellation) 시 오류(error)를 발생(throw)시키려면,Task.checkCancellation()을 사용한다. 사용자 정의(custom) 취소(cancellation) 논리(logic)를 안전하게(safely) 확인(check)하고 구현(implement)하려면Task.isCancelled를 사용한다.- 값(value)을 작업(task)과 그 모든 하위 작업(children)에 바인딩(bind)하려면,
withValue()와 함께@TaskLocal속성(property) 래퍼(wrapper)를 사용한다.
이 장(chapter)의 앞부분에서, 고유한 사용자 정의(custom) 비동기(asynchronous) 시퀀스(sequence)를 생성(create)하는 몇 가지(few) 방법에 대해 배웠다(learned). 이제(now), 기존(existing) 비동기(asynchronous) 시퀀스(sequences)를 활용(leveraging)한 새로운(newly) 모델에 익숙해 졌으므로(equipped with) 자신만의(own) 비동기(asynchronous) 스트림(streams)을 간결하게(succinctly) 생성(create)할 수 있는
AsyncStream에 대해 자세히(deep dive) 알아볼 완벽한(perfect) 시기인 것 같다. 또한 사용자 정의(custom) 시퀀스(sequences)를 구동(power)하는 기본 프로토콜(underlying protocols)과 흥미로운(interesting) 구현(implementation) 세부 정보(details)에 대해 알아야 할 모든 것을 배우게(learn) 된다. 다음 장(chapter)에서 만나자.'Raywenderlich > Modern Concurrency in Swift' 카테고리의 다른 글
Chapter 4: Custom Asynchronous Sequences With AsyncStream (0) 2023.01.30 Chapter 2: Getting Started With async/await (0) 2022.12.21 Chapter 1: Why Modern Swift Concurrency? (0) 2022.12.15